
Washer Lid Lock Fixes: Unlock Your Washing Machine

A stuck washer lid lock is usually caused by a jammed lid strike, debris, or a failed solenoid rather than a broken control board, and most repairs cost between $50 and $150 for parts. Start with the simple mechanical checks before you buy an electronic control board or force the lid open.
The problem often appears at the worst possible time. The washer has stopped halfway through a load, the lid-lock light is flashing, and a tub full of wet clothes is sitting behind a lid that won't open. It's easy to assume the machine has suffered a major electronic failure. In practice, the lock is often reacting to a physical obstruction, poor lid alignment, or a connector that has worked loose under vibration.
A washer lid lock is both a safety device and a control input. Treat it carefully, follow the diagnostic order, and don't bypass it just to finish a load.
Why Your Washer Lid Lock Is Stuck and What It Does
The washer stops late in a cycle, the tub is motionless, and the lid remains shut. You press Start, then Cancel. The controls respond with little more than a click, while wet laundry sits inside. That sequence often sends homeowners toward the main control board, even though the fault may be at the lid, strike, or lock assembly.
The washer lid lock is an electromechanical safety assembly. It confirms that the lid is closed and, on many modern top-load machines, physically prevents access while the tub spins. The washer may also refuse to fill or wash when the lid is open. Whirlpool's product guidance on lid locking describes this behavior in top-load high-efficiency washers.
Why manufacturers use a lock
An open lid over a moving tub creates a serious injury hazard. Whirlpool's lid-lock information cites 19,109 washing-machine injuries reported in the United States from 1993 through 2000. That historical safety record helps explain why manufacturers adopted stronger automatic protection.
GE's design history illustrates how this feature became standard behavior in major-market top-load appliances. Starting in 2015, GE top-load washers used a lid lock during load sensing and whenever spin speed exceeded 50 RPM, according to the manufacturer guidance cited in the original safety discussion. The lock can engage before the fastest part of the cycle. The machine needs a confirmed lid signal before it fills, agitates, or spins.
This is why a lock fault can look like a broader electronic failure:
The washer won't start: The control does not receive confirmation that the lid is closed and locked.
The cycle stops before spin: The machine receives a lock signal it cannot verify.
The indicator flashes: The striker may not have entered the lock, or the mechanism may not have reached its expected position.
The lid remains locked after stopping: Water left in the tub, a failed release mechanism, or an interrupted cycle may keep the assembly engaged.
The washer fills or pauses unexpectedly: The control may be waiting for a valid lid signal before continuing.
The lock has more than one failure point
The lid itself is only one part of the system. A plastic lid strike, also called a striker, is fixed to the underside of the lid. Closing the lid sends that tab into the lock body mounted near the washer rim. Inside the body, a motor or solenoid moves the latch, and switches report the locked or open condition to the control.
That mechanical path is the first place to look. A cracked striker, bent hinge, sagging lid, or buildup of detergent residue can prevent the tab from entering correctly. The electrical components may still be healthy, yet the washer reports a lock fault because the assembly never reaches the position the control expects.
Whirlpool's service sequence puts this mechanical inspection ahead of condemning the control board. Skipping it creates the common misdiagnosis trap: replacing an expensive board when the actual problem is a damaged plastic tab or misaligned lid.
Practical rule: A flashing lock light means the washer did not confirm the required position. It does not prove that the main control board is defective.
For broader appliance assistance, owners can review laundry repair services and guidance. Keep the response controlled and methodical. Do not pry at the lid, defeat the safety lock, or order a board based only on the display light.
Safe Diagnostics Before You Touch Any Parts
The safest troubleshooting path is narrower than most online repair advice suggests. Whirlpool service documentation puts the lid-lock test and mechanical inspection before control-board replacement. That order matters because a board is an expensive answer to a problem that may be sitting in plain sight on the lid.
Before touching wiring or removing a panel, clear the area around the washer. Keep children away, remove loose clothing from the top, and don't reach into a moving tub. If you see standing water, treat the machine as an active appliance with a potential drainage problem, not as a harmless locked box.
Start with a controlled reset
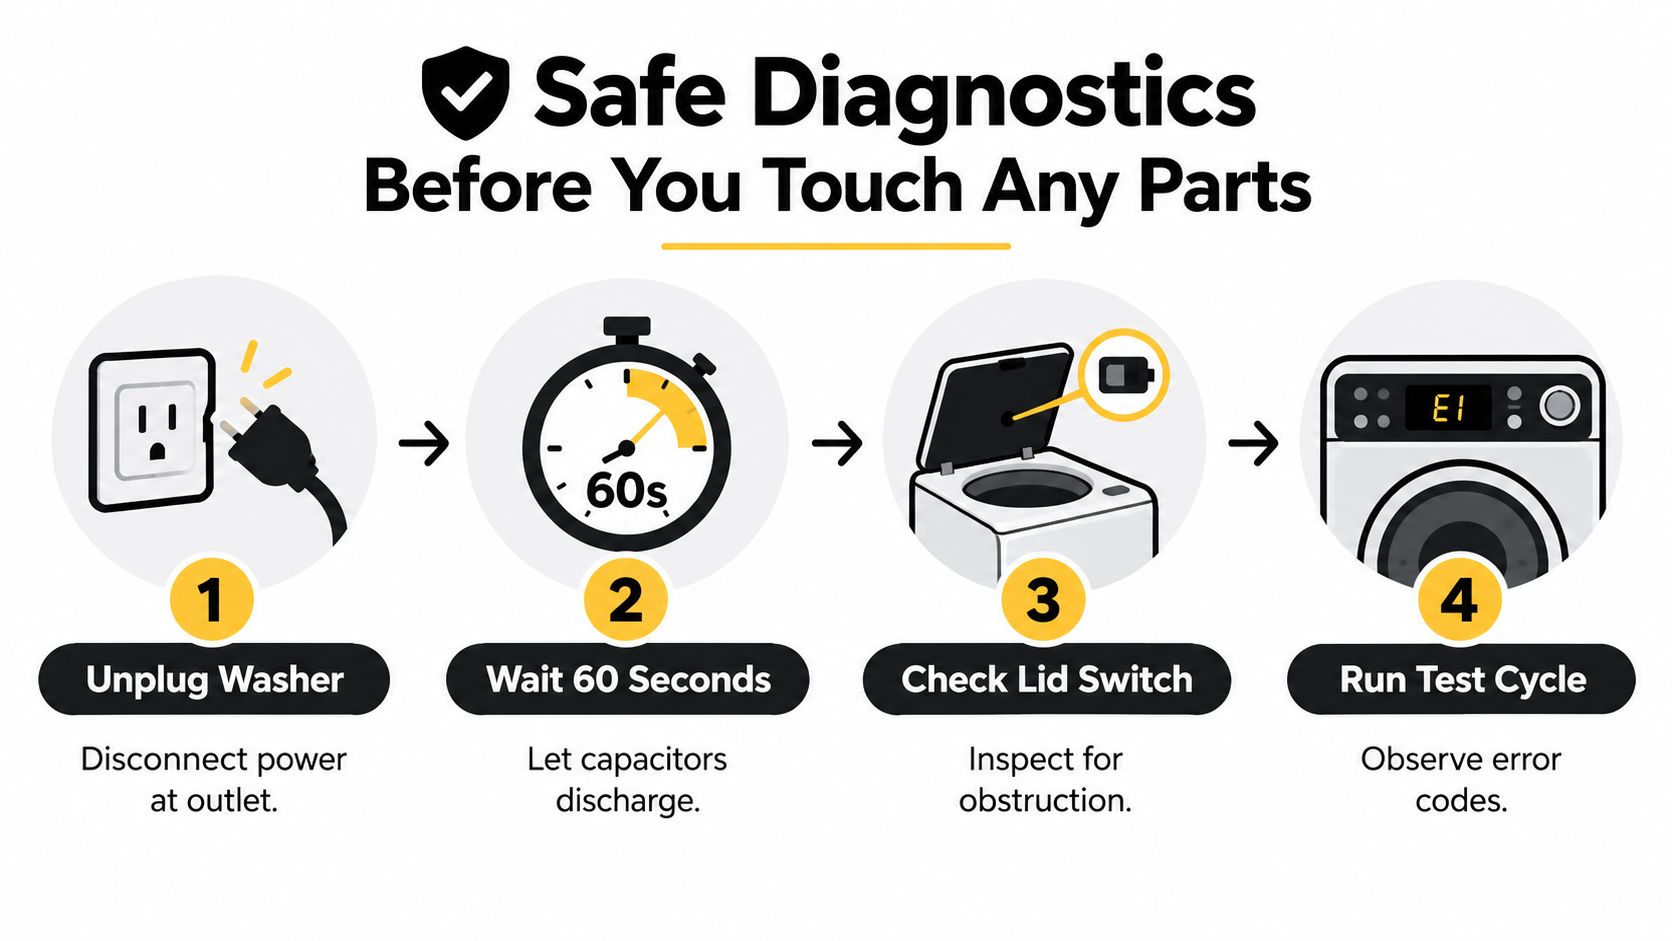
Disconnect the washer from the wall outlet. Product guidance recommends a 5-minute power reset to clear a control-state issue, so use that longer reset rather than repeatedly pulling the plug for a few seconds. Restore power only after the wait, then close the lid gently and try the machine's normal cancel or drain function.
A reset can clear an interrupted cycle, but it can't repair a broken striker or a failed motor. If the lock fault returns immediately, record what the washer does. Note whether the lock clicks, whether the indicator flashes, whether the tub contains water, and whether the cycle stops at the same point.
Run the built-in test mode
Many washers have a manufacturer-specific manual or diagnostic mode. The exact button sequence depends on the model, so use the model's tech sheet or service instructions rather than guessing. Whirlpool's official washer tech sheet places the manual lid-lock test early in the workflow.
The test is more informative than just pressing Start. Watch whether the lock engages, whether it holds, and whether it releases when commanded. A mechanism that never moves points toward a mechanical blockage, failed lock motor or solenoid, wiring issue, or power supply problem. A mechanism that locks and releases correctly shifts attention toward the operating cycle, sensor interpretation, or another stored fault.
Don't improvise a bypass with a magnet, screwdriver, tape, or a tied-down lid. That defeats the safety system and can let the tub operate without reliable protection.
Inspect the striker and lock opening
Disconnect power again before inspecting the physical parts. Look at the plastic striker beneath the lid. It should be intact, straight, and positioned so it enters the lock opening without scraping the rim. A cracked striker may still look normal until the lid is lowered, so compare its position with the opening rather than checking only for a missing piece.
Use a flashlight to inspect the lock body. Look for lint, hardened detergent, a small object, or a piece of broken plastic. Clean accessible residue carefully with a dry cloth or a soft brush. Don't pour liquid into the lock and don't insert a metal tool into the opening while the washer is connected to power.
Also check the lid hinges. A lid can look closed while sitting slightly high or off-center because a hinge has loosened or bent. That small change can prevent the striker from reaching the latch, causing the washer to report the same fault as a dead lock.
Verify the harness before condemning the board
If the physical inspection is clear and you can safely access the connection, inspect the wiring harness and connector seating at the main control. Disconnect power first. Look for a connector that isn't fully seated, damaged insulation, bent terminals, corrosion, or wiring stretched against the cabinet.
Vibration can expose a marginal connection. The lid lock may work intermittently, click once and stop, or fail after the washer moves into a high-vibration portion of the cycle. Reseating a connector isn't the same as repairing a damaged harness. If a terminal is burned, a wire is frayed, or the connector won't stay locked, stop and arrange service.
The most expensive misdiagnosis happens here. A homeowner sees a lock error, skips the striker and harness inspection, and replaces the control board. The washer then behaves exactly as before because the board was never the cause.
Don't replace the control board until the lock has failed its own test and the striker, hinges, and connector have passed inspection.
Measure the lock only after the simple checks
A multimeter can help, but only if you know the model's resistance table and understand how to isolate the component. Disconnect power, disconnect the lock harness, and follow the manufacturer's terminal and resistance instructions. Whirlpool's service workflow calls for replacing the lid-lock mechanism when the connection is good but the measured switch values don't match the specified open and closed readings.
A continuity result by itself isn't enough for every assembly. Some locks contain more than one switch or an electronic actuator, so testing random pins can produce a misleading answer. If you don't have the correct tech sheet, don't guess at live voltage tests. The diagnostic conclusion should be based on the correct terminals, the correct lock state, and the correct model-specific values.
At the end of this sequence, you should be able to classify the fault:
Mechanical: The striker, hinge, lock opening, or latch movement is obstructed or misaligned.
Connection-related: The harness, connector, terminal, or wiring is damaged or loose.
Component-related: The lock mechanism fails the manual test or resistance checks.
Control-related: The lock and wiring pass their checks, but the control doesn't operate or interpret the circuit correctly.
That classification is what protects you from buying parts by guesswork.
How to Unlock a Washer Lid Manually Without Causing Damage
A locked lid becomes urgent when wet laundry is sitting inside, but urgency doesn't make force safe. First confirm that the tub has stopped moving and that the washer isn't actively filling or draining. If there is water in the basket, don't reach inside or tilt the appliance to get access. The water level may indicate a separate drain or pump problem, and opening the lid could create a spill or expose moving components.
Try the non-invasive release first
Press Cancel or Pause according to the washer's normal controls, then give the mechanism time to respond. Some machines keep the lid locked briefly after a cycle or during a drain sequence because the control needs to confirm that movement and water conditions are safe. Don't pull upward while the latch is engaged. That can bend the plastic striker or crack the lock housing.
If the washer has stopped because of a temporary control-state problem, disconnecting power and completing the controlled reset described earlier may allow the lock to release. Keep the lid closed while power is removed. After restoring power, listen for the release click and use the normal drain or cancel command before attempting access.
A lock that remains engaged with no water, no drum movement, and no response after the reset may need a manual-release procedure specific to the model. Some top-load designs provide access beneath the top panel, while others use a release near the lock body. The location and method aren't universal, so consult the appliance manual or service sheet.
Protect the striker while you work
The striker is often the part homeowners damage while trying to open a locked lid. It can bend when someone lifts the lid against a partially engaged latch, and it can snap when a tool is used as a lever. Once damaged, even a replacement lock may fail to engage correctly.
Keep the washer unplugged before any access procedure. Use only the release method specified for the model, and support the lid rather than letting it spring upward. If accessing the release requires removing the top panel, stop if the panel is difficult to remove or if the machine's construction puts your hands near exposed wiring.
Don't use a flathead screwdriver to pry between the lid and cabinet. That approach may open the lid, but it can distort the strike path, chip the cabinet finish, and leave the safety assembly unreliable. A minor failed lock can become a damaged lid, a broken hinge, and a second service problem.
If the lid resists a model-specific release, stop pulling. The force is acting on the striker or latch, not solving the underlying fault.
Decide whether access is safe
Manual release is reasonable when the washer is unplugged, the tub is stationary, and there is no visible water hazard. It isn't reasonable when the machine is still spinning, the basket is full, the cabinet is unstable, or you can't identify the correct release procedure.
If the lid opens after a reset, don't assume the repair is complete. Run the manufacturer diagnostic test before using the washer normally. A lock that releases once but fails to hold during the next cycle remains a safety problem.
For homeowners who aren't comfortable removing panels or handling appliance wiring, a local handyman and home repair service can handle access without turning a stuck lid into cabinet or lock damage. A technician should still follow the appliance's service procedure, not just defeat the latch and send the washer back into use.
Use the following sequence when clothes must be retrieved:
Stop the cycle normally: Use Cancel or Pause and wait for the washer to stop.
Check for water: Don't open a water-filled basket or move the appliance to reach the lid.
Disconnect power: Unplug the washer before inspecting or accessing the lock.
Try the documented release: Use the model's manual-release location and method.
Inspect after opening: Check the striker, latch opening, and hinges for damage.
Test before reuse: Confirm that the lock engages and releases in diagnostic mode.
The objective is not merely to get the lid open. The objective is to preserve the safety mechanism so the washer can be repaired correctly.
Common Washer Lid Lock Failures and Replacement Options
Once the washer has been safely inspected, the failure pattern becomes easier to interpret. Field-level repair data identifies the failed lid-lock solenoid or motor as about 40% of cases, a cracked or broken plastic lid strike as about 35%, misaligned or bent lid hinges as about 15%, and frayed wiring harnesses or control-board faults as about 10%. These figures come from field-level washer lid replacement guidance.
The practical lesson is more important than the ranking. Most problems are found at the lid, hinge, lock body, or connector before a technician needs to condemn the main board. That's why a visual inspection can save more time than immediately ordering the most expensive electronic part.
What each failure looks like
A failed solenoid or motor may produce no movement, a weak click, or a lock that starts to engage but won't hold. The assembly can wear internally even when the outside housing looks clean. If the mechanism fails the manufacturer's manual test and the harness is secure, replacing the complete lock assembly is generally more sensible than trying to repair its internal motor.
A damaged lid strike is a mechanical failure with an electrical symptom. The washer may power on normally, but the strike doesn't push the latch into the required position. Look for a split, missing section, deformation, or a strike that no longer lines up with the lock opening.
A bent or loose hinge changes the geometry of the lid. Tightening or correcting the hinge may restore alignment, but don't force the lid down to compensate. Excess pressure can damage the replacement strike or cause the lid to sit unevenly again.
A wiring or control fault deserves more caution. A connector can be loose while the board remains healthy. A broken wire can interrupt the signal only when the cabinet vibrates. The control board should become the leading suspect only after the lock assembly and wiring pass the relevant tests.
Choose the correct replacement
Never order a lid lock from a photograph alone. Washer families can use assemblies that look almost identical but have different connectors, mounting points, switch arrangements, or control logic. Find the model and serial label, then match the complete part number in the manufacturer's parts list or service documentation.
Before fitting a replacement, compare the old and new assemblies:
Connector shape: The terminals must match without forcing the plug.
Mounting points: Screw holes, clips, and guide tabs should align.
Striker path: The new lock must sit at the same position relative to the lid.
Harness routing: Wires must stay clear of the tub, hinge, and moving cabinet parts.
Test compatibility: The assembly must match the washer's diagnostic procedure.
A replacement part doesn't correct a bent hinge or a damaged striker. If the underlying alignment is wrong, the new lock may fail immediately or wear prematurely.
DIY or professional replacement
A confident DIYer with a model-specific service sheet, basic screwdrivers, a flashlight, and a suitable multimeter may be able to replace an accessible lock assembly. The work still begins with power disconnected, and the washer should not return to service until the lock completes its diagnostic test.
DIY becomes a poor choice when the top panel is difficult to access, the harness is damaged, the control board requires live electrical diagnosis, or the machine is under warranty. A wrong connector or pin test can damage a good control, while an incorrectly routed harness can rub against moving parts.
Repair situation | Sensible first choice | Main risk |
|---|---|---|
Debris or a visible obstruction | Careful cleaning with power disconnected | Pushing debris deeper into the lock |
Cracked lid strike | Correct model-specific strike replacement | Installing a part that doesn't match the lid |
Misaligned hinge | Hinge inspection and adjustment | Forcing the lid and damaging the lock |
Failed lock assembly | Full lock replacement after testing | Replacing the lock without checking alignment |
Suspected control board | Professional electrical diagnosis | Paying for a board when the lock circuit is at fault |
The correct repair is the one that restores reliable locking, not merely the one that clears the indicator. Run the manufacturer's manual test after any replacement and confirm both engagement and release.
Repair Costs, Time Estimates, and When to Call a Local Technician
A washer lid-lock repair can be straightforward when the cause is visible and the replacement part matches the model. The time and risk increase when the washer has standing water, a damaged harness, a bent cabinet, or a control fault that requires electrical testing. A cheap part doesn't make an incorrect diagnosis cheap.
Use this decision framework:
Choose a simple homeowner check when the washer is unplugged, the striker is visibly obstructed, and no panel removal is needed.
Consider a DIY replacement when you have the exact service information, can identify the correct assembly, and are comfortable testing a de-energized circuit.
Call a technician when the lock fails its test but the physical parts look sound, when wiring is damaged, or when the control board becomes a possibility.
Stop immediately if there is water around the electrical area, a burning smell, exposed conductors, cabinet instability, or a lid that won't release without force.
A professional diagnosis also makes sense when the same fault returns after a replacement. Repeated failure can indicate striker alignment, hinge movement, harness strain, or a control issue that the first repair didn't address. The final test should show that the washer locks, holds, releases, and completes the intended cycle.
For homeowners in St. Charles, O'Fallon, Lake St. Louis, Chesterfield, Wildwood, St. Peters, Ballwin, and nearby communities, local washer and appliance repair services can provide a practical alternative to repeated parts purchases. Ask for the cause of failure, the part being recommended, and whether the technician will verify the lock operation after installation. Transparent pricing and financing flexibility can also matter when a lid-lock problem appears alongside another appliance repair.
Preventive care is uncomplicated. Don't slam the lid, keep detergent buildup away from the striker and lock opening, and address intermittent clicking or flashing indicators before the washer stops completely. A clean, aligned striker gives the lock the best chance to engage without excess stress.
If your washer lid lock is stuck, 1st Choice Home Repairs can diagnose the striker, hinge, wiring, and lock assembly instead of guessing at the control board. The team provides washer and dryer repair for homeowners across the St. Charles area, with same-week service availability, upfront communication, and flexible financing options. Visit 1st Choice Home Repairs to request help with a safe, properly tested repair.
Comments