
Fix Dishwasher Door Problems at Home

You unload the dishwasher in bare feet and step straight into cold water. The cycle finished, the dishes look clean, and nothing sounded wrong, but there's a puddle spreading from the lower door edge toward the cabinets. Before you order a gasket, slow down. To fix dishwasher door trouble for good, you need to find whether you're dealing with a worn part, a crooked installation, or both.
When the Door Becomes the Problem
That puddle is the version you meet first. Others meet a door that falls open the second they let go, scrapes one side of the tub, or refuses to click shut unless they lean a hip into it. The symptoms feel unrelated, but they usually sort into five fault categories that help you narrow the search fast.
The door carries more responsibility than its simple appearance suggests. It supports the tub opening, carries the latch and often the controls, compresses the perimeter gasket, and trips a safety interlock that stops the machine when opened. If any part of that system is off, the dishwasher can leak, refuse to start, or stop mid cycle even though the pump and motor are fine.
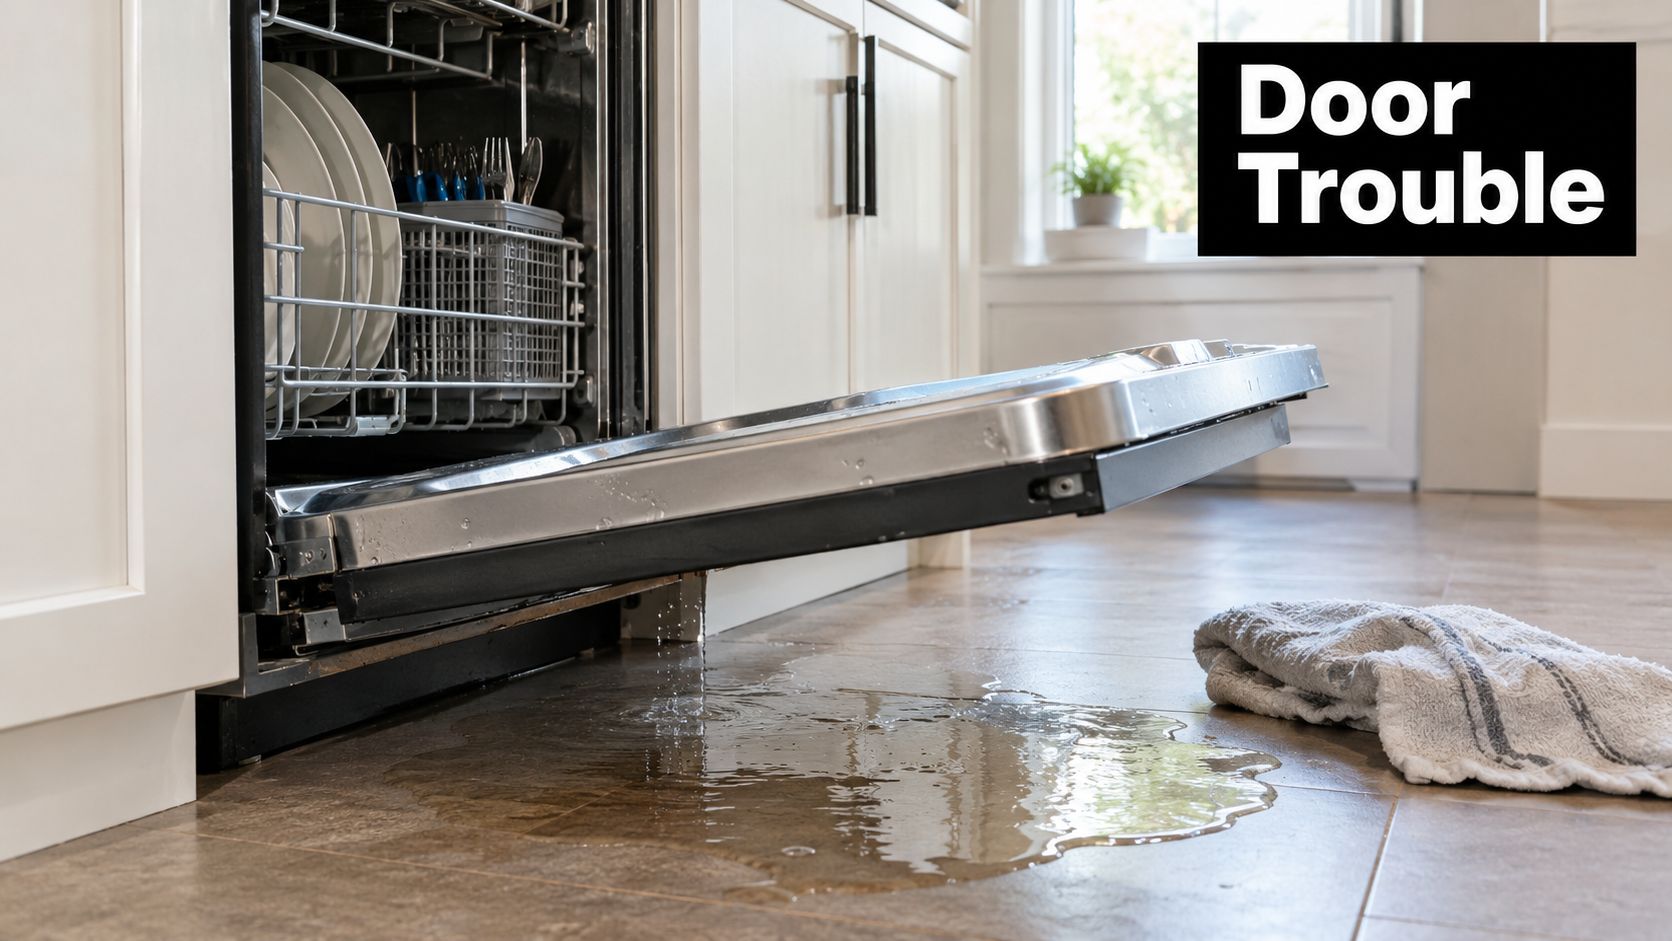
The Five Ways Doors Usually Fail
Sagging or misalignment: One corner sits low, the gap looks wider on one side, or the inner panel rubs as it closes.
Latch failures: The door looks shut but won't start, pops open during spray, or needs force that grows worse over time.
Hinge, spring, and cable wear: The door feels unusually heavy, drops abruptly, or won't stay at a comfortable loading angle.
Gasket damage: You find cuts, flattened sections, twists, or a seal pulled out of its groove, often with leaks at a corner.
Installation problems: The tub is twisted in the cabinet, the unit isn't level, or a decorative panel binds against neighboring cabinetry.
That last category catches homeowners off guard. A door can latch and still not seal if the tub itself is racked. People replace the gasket, watch the leak return in the same spot, and assume the new part was defective. Usually the geometry was wrong before the old gasket ever failed.
A leak tells you where water escaped. It does not, by itself, tell you why.
Why Wear Shows Up Here First
The workload explains a lot. The U.S. Department of Energy has used an average of 197 dishwasher cycles per year in recent rulemaking, while earlier federal analyses used 215 cycles annually, according to the Department of Energy dishwasher rulemaking analysis. At that pace, you're approaching 1,000 cycles in five years, and every one asks the hinges to carry the panel, the latch to engage, and the seal to hold hot water and spray pressure inside.
Modern machines raise the stakes further. Dishwashers evolved from Miele's first electric model in Europe in 1929 to sensor controlled appliances, a progression traced in Miele's dishwasher milestones history. The electronics got smarter, but the door stayed mechanical, exposed, and handled by everyone in the house, including kids who use it as a step and adults who set a heavy stockpot on the open panel.
Most of these faults are diagnosable with basic tools and patience, especially if you resist ordering parts on the first hunch. If the rest of your kitchen is due for attention too, start here anyway. A door that seals and latches correctly protects the floor and cabinets around it.
Tools, Materials, and a Safe Workspace
Clear the floor in front of the dishwasher and give yourself room to open the door fully and kneel without twisting. Remove anything stored under the sink if you'll need the shutoff valve or outlet. Good light matters more than fancy equipment, because most door faults announce themselves visually once you can see the hinge pockets and the gasket channel.
Gather your kit before the first screw comes out so you're not hunting through drawers with a loose panel in one hand.
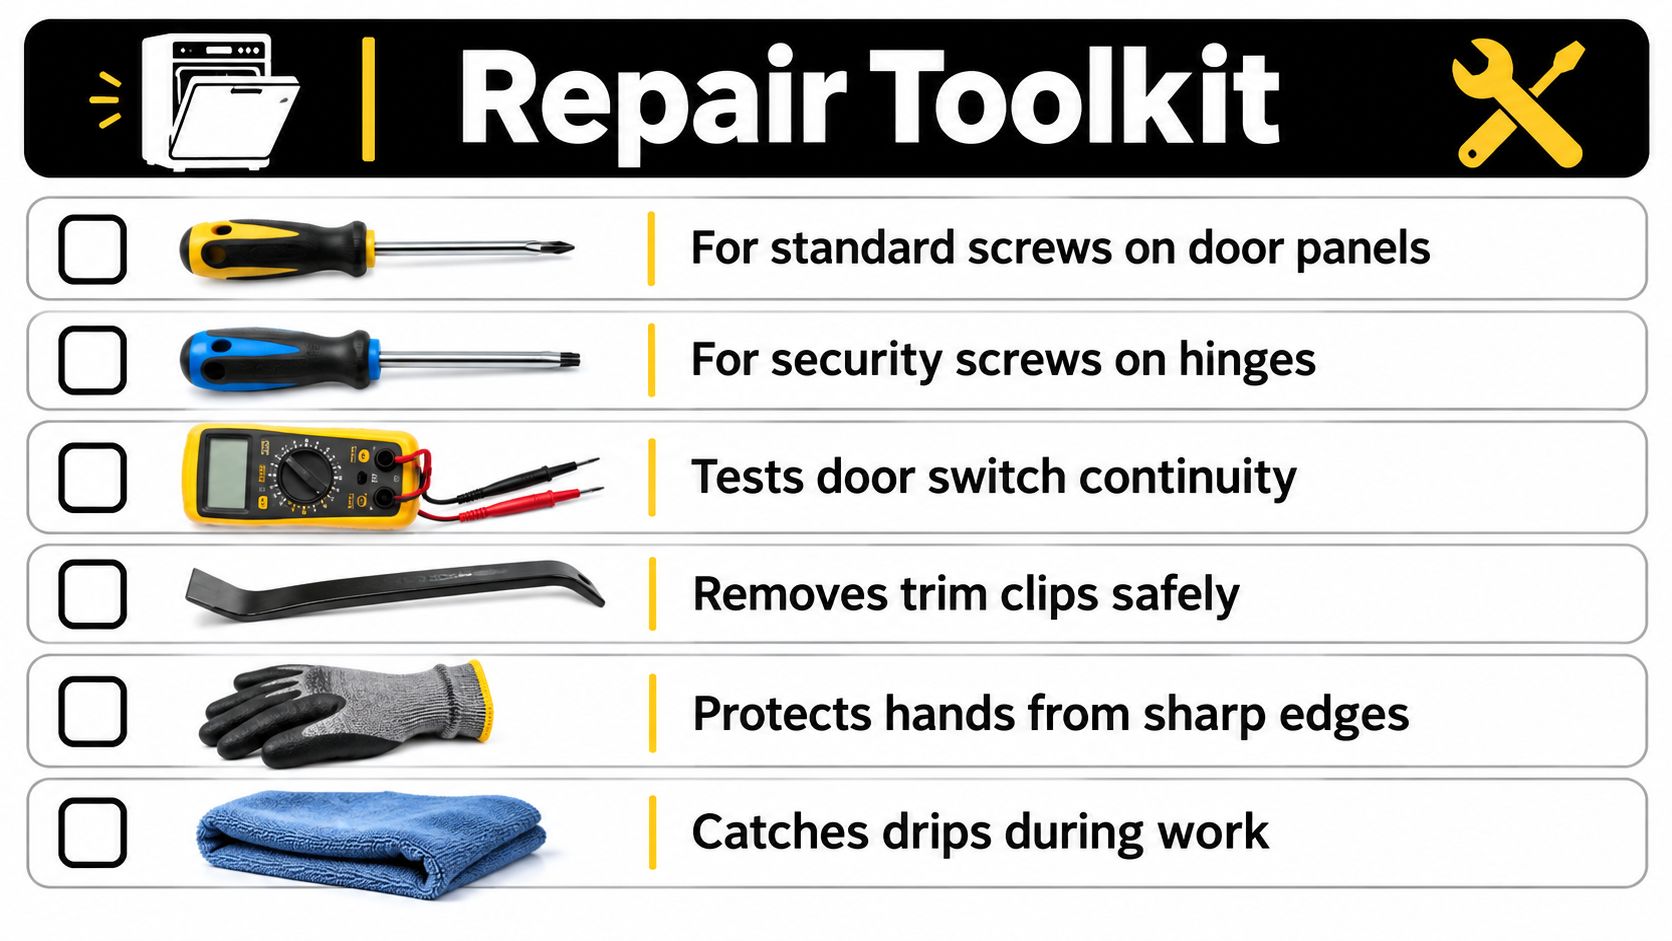
What Earns a Spot on the Towel
You'll want Phillips and Torx drivers because door panels and hinge hardware mix fastener types, sometimes on the same machine. Needle nose pliers handle cable links and small clips without tearing them up. A multimeter lets you test whether the door switch changes state when the latch engages, which separates a mechanical problem from an electrical one.
Add a small level, a flashlight or headlamp, microfiber cloths, and a turkey baster or wet dry vac for standing water in the tub sump. A magnetic tray or even a muffin tin keeps screws sorted by location. Door panels often use screws of slightly different lengths, and mixing them up can dimple a panel or leave a corner loose.
Safety Prep Comes Before Curiosity
Turn the breaker off and confirm the controls are dead before you remove any panel or reach near the latch wiring. Unplug the unit if it's cord connected. Close the water supply at the shutoff, then bail out standing water so it doesn't spill across the floor the first time the door swings open.
Wear gloves when your hands go near stamped metal edges inside the door or around the hinge arms. Those edges are sharper than they look. If the machine is hardwired and you can't confidently isolate it, that detail alone moves panel work into professional territory.
Shop rule: If you can't verify the power is off, you don't have a workspace yet. You have a hazard with a towel under it.
Parts Sourcing Without Guesswork
Order gaskets, latch assemblies, hinge kits, and cable sets by exact model number, not by what looks close in a product photo. The model tag usually lives on the door edge or tub frame. A gasket that's slightly thick or a cable that's slightly long changes how the door sits, and you'll chase the new problem thinking it's the old one.
This short walkthrough shows the general layout you'll be working around before you start.
Budget your time by category. Cleaning and reseating a gasket is a short job once access is clear. Latch replacement takes longer because the inner panel comes apart. Hinge and cable work deserves an unhurried afternoon, since rushing spring hardware is how fingers get pinched and links get routed wrong.
The Diagnosis-First Sequence
Most wasted money in door repair comes from a simple habit. The homeowner sees water at the bottom edge, buys a gasket, installs it carefully, and watches the same corner drip on the test cycle. The gasket was never the root cause. The tub was tilted, a utensil was trapped against the seal, or the cabinet was pressing the panel out of square.
Work in a fixed order and you'll avoid that loop. Start with what's free to check, move toward hardware, and finish with the installation itself. The sequence below mirrors how a technician sizes up a door complaint on arrival.
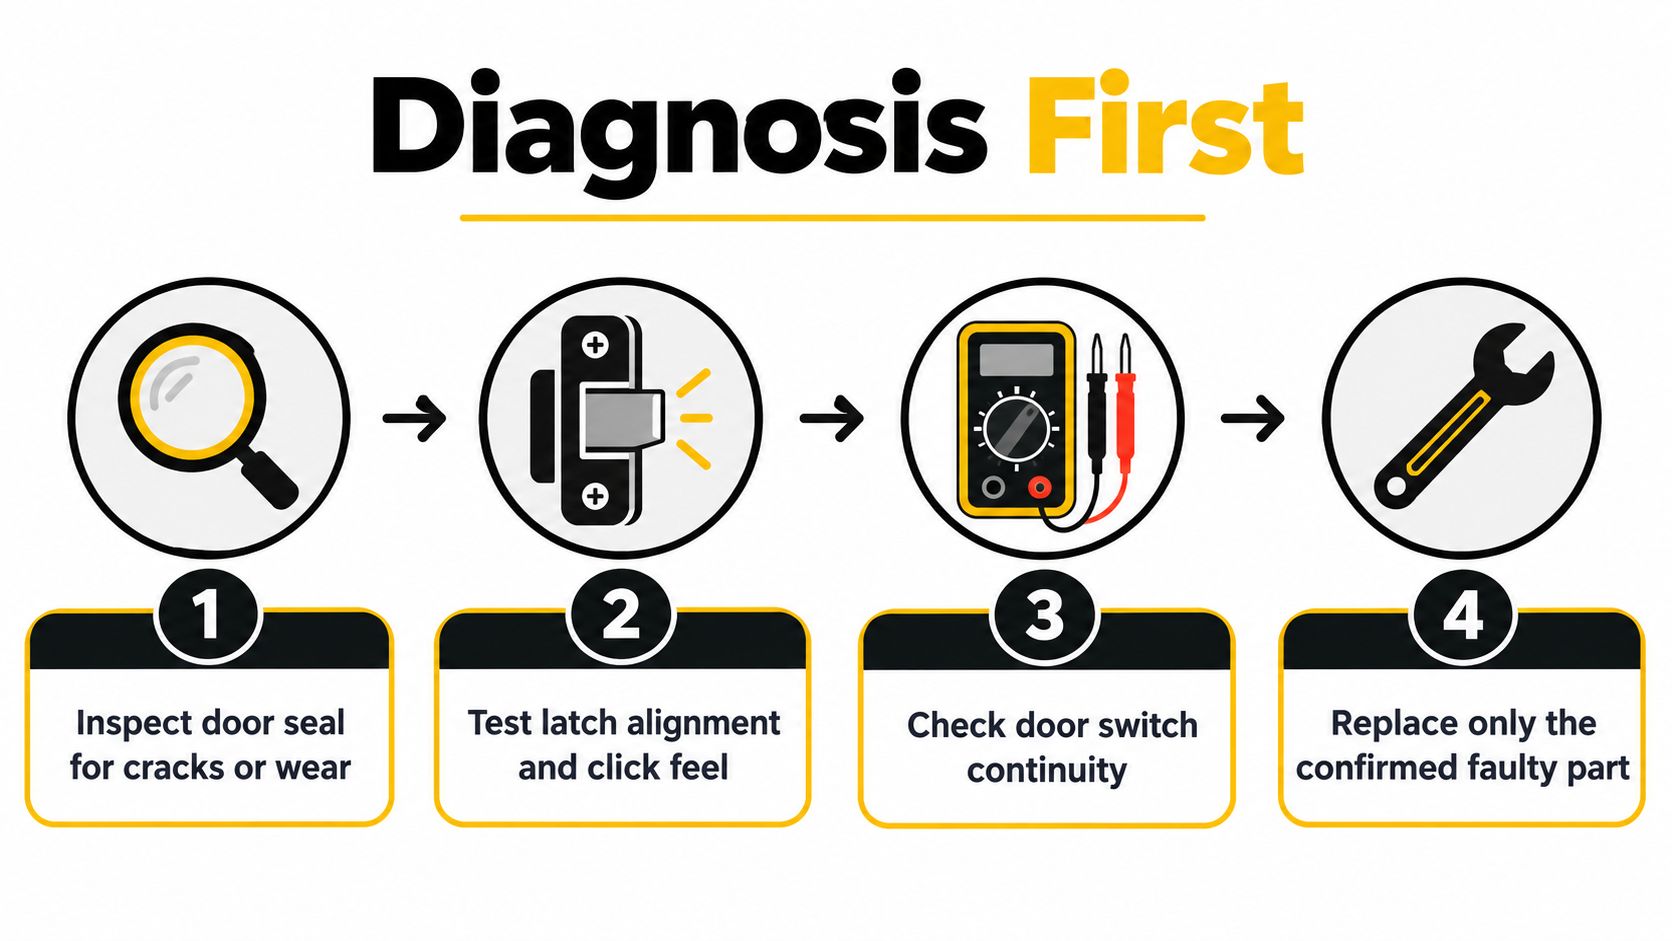
Start With Power Off and Racks Out
Kill the breaker, pull the lower rack, and slide the upper rack out where you can see whether anything protrudes past the tub opening. Look along the seal line for a fork handle, a straw, or a shard of plastic cup wedged where the door compresses. Small obstructions create surprisingly convincing leak symptoms because they hold the gasket off the tub at exactly one point.
Now run a fingertip slowly around the gasket and its seating channel. You're feeling for cuts, hard flattened spots, sections pulled free of the groove, and grit packed into the channel. Clean the groove before you judge the seal, since debris alone can hold a healthy gasket out of position.
Read the Gasket Before You Replace It
If the seal needs reseating or replacement, start at the top center and press it evenly into the groove, working outward so both sides stay uniform without twists or bulges. Don't stretch it to make the ends meet, don't trim it unless your model's instructions say to, and skip improvised adhesive. Each of those shortcuts creates a low pressure zone that leaks under spray. GE's guidance ties door leakage to damaged or incorrectly seated gaskets and to cabinet contact with the control panel, as covered in GE Appliances guidance on dishwasher door leaks.
Close the door slowly and watch the reveal around the panel. The gap should look even left to right, and resistance should build uniformly in the last portion of travel. A door that meets resistance early on one side is telling you something is binding, not that you should push harder.
Check the Latch Feel and the Tub, Not Just the Door
A healthy latch engages with moderate, uniform force and a positive click. Grinding, a spongy stop, or a click that happens before the panel looks flush all point to misalignment or broken plastic in the latch body. Note whether the machine recognizes closure consistently, since intermittent recognition often means the strike barely reaches its target.
Then level the tub itself. Set your level on the tub's front edge and along an open rack rail, not just on the door face, because a door can look straight while hanging on a twisted tub. Electrolux notes that leveling, tub squareness, and cabinet obstruction can all produce door leaks, as described in Electrolux support guidance on leaking dishwashers. Check whether leveling legs carry weight or whether one corner floats.
Compression check: After closing, look for a continuous, even compression line where the gasket meets the tub.
Paper slip screening: Slide a receipt around the closed perimeter and note spots where it moves with no drag.
Cabinet contact check: Watch the control panel and panel edges for contact with cabinets or countertop as the door closes.
Treat the paper test as screening only. It finds gaps, but it can't replicate spray pressure, heat, or a tub that flexes when full of water. The final verdict comes from a short empty rinse while you watch the hinge side corners and lower edge with a flashlight, ready to stop the cycle if water appears near wiring.
Three Real-World Door Problems and How They Unfold
Diagnostic logic sticks better when you see it attached to actual kitchen floors. These three patterns cover a large share of door complaints, and each one punishes the parts first approach in a different way. Read for the reasoning, not the shopping list, because your model will differ in the details.
The Door That Slowly Gave Up Holding Itself
A homeowner describes a door that used to rest at a comfortable angle for loading and now slides down until it rests on their shins. There's no bang, no visible break, just a panel that feels heavier every month. That gradual change usually means a nylon cable or link has stretched or a spring has lost tension on one side, so the remaining side carries more load and wears faster.
Tightening nearby screws won't restore lost elasticity. The fix is a model specific cable and link set, replaced as a matched pair even if only one side looks tired, because unequal tension twists the door every time it moves. After replacement, the door should lower smoothly, hold position, and rise without a sideways pull.
The Latch That Refused a Perfectly Good Door
Another call starts with a machine that won't run and a latch that feels almost right. The panel sits flush, the gasket looks clean, but the click never lands. A flashlight aimed into the strike opening reveals the culprit more often than you'd expect: a sliver of plastic from a souvenir cup, a twist tie, or a utensil tip lodged where the latch needs to travel.
Clearing debris with tweezers takes minutes and costs nothing. If the latch still won't engage, inspect for cracked plastic in the latch body and confirm nothing about the racks or inner panel holds the door a fraction short of full closure. GE's service guidance covers checking latch obstructions and binding, seal seating, rack interference, and door switch contact while operating the latch, detailed in GE Appliances guidance on doors that will not close.
The cheapest tool in latch diagnosis is a flashlight. Use it before the parts catalog.
The Puddle That Survived Two New Gaskets
The third pattern is the stubborn one. A leak appears at the same lower corner cycle after cycle, the gasket gets replaced, and the puddle returns within a week. The homeowner starts suspecting a cracked tub. On inspection, the seal is fine, but the unit sits slightly out of level on a soft spot in the subfloor, so water inside the tub rests toward one front corner and overwhelms the seal there first.
Shimming and leveling the front legs, then confirming the tub sits square in the opening, solves what two gaskets couldn't. This is the core lesson when you fix dishwasher door leaks that repeat in an identical spot. Repetition at one corner is geometry talking, not rubber failing at random.
A few habits tie all three stories together. Photograph hardware before you disconnect it, since cable routing looks obvious until you're holding the new part. Read the model number off the door frame sticker before ordering anything. Finish every repair with a short rinse cycle while you watch, because a closed door that merely looks right hasn't proven anything yet.
Property managers see a fourth variation worth noting. In rental turnovers, doors often suffer from hurried loading and tenants forcing a latch against protruding pans. The hardware survives, but the panel alignment drifts. A five minute alignment check between tenants prevents the leak call that arrives during the first week of a new lease.
Hinge, Spring, and Cable Replacement Done Right
Hinge hardware does two jobs at once. It carries the full weight of the door panel, racks included when they're rolled out onto it, and it manages the spring energy that keeps that weight from free falling. When a hinge arm bends, a cable frays, or a plastic link cracks, adjustment stops being an option. Stressed parts don't return to their original geometry because you bent them back with pliers.
Signs you've crossed into replacement territory are plain once you look. The door drops faster than it used to, one side leads the other as it opens, or you can see a hinge arm that no longer mirrors its partner. Unequal tension shows up as a panel that twists slightly at the end of travel.
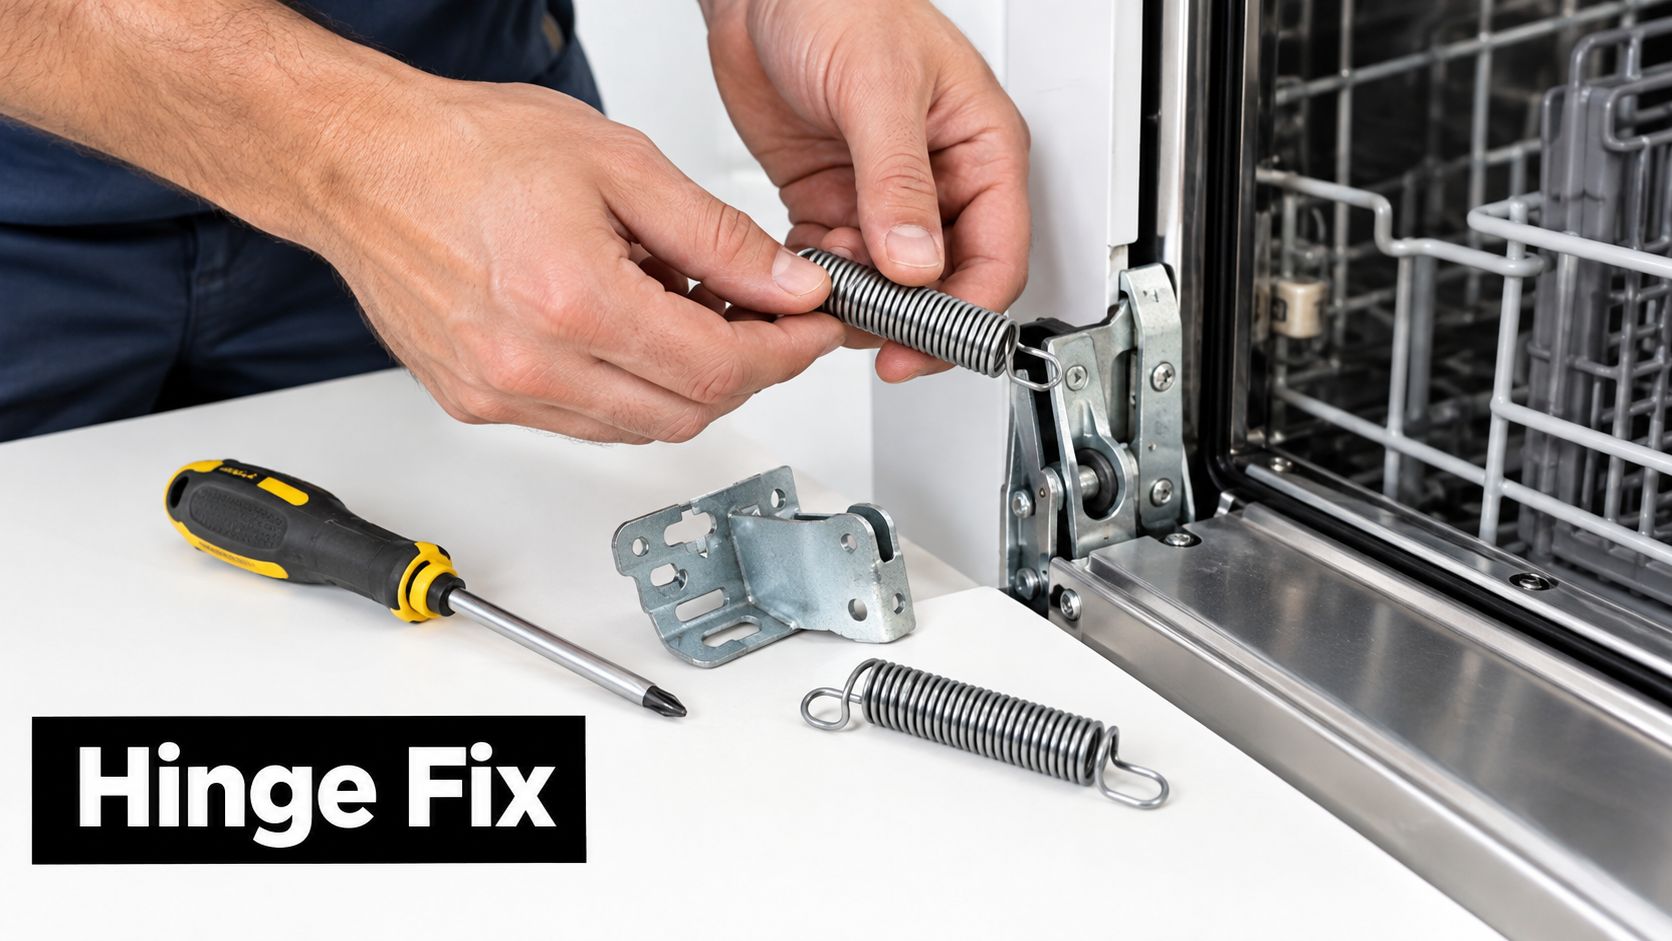
Handling Stored Energy Safely
Springs and cables hold real tension even with the door open, so relieve and control that tension deliberately instead of unhooking parts and hoping. Support the door with a helper, a sturdy wedge, or blocking that can't slip, because a panel released from one side swings with surprising enthusiasm. Unthread links along their intended path rather than prying them sideways, which cracks the plastic you're trying to preserve.
Keep left and right hardware separated as it comes off. Hinge pins and springs are often handed, meaning each side has its own orientation, and swapping them produces a door that binds in a way that's maddening to trace later. Lay parts out on a towel in the order and orientation they were removed.
Details That Decide Whether It Lasts
Replace cables and links as a set: A fresh cable beside a stretched one guarantees uneven pull.
Match spring position exactly: Many springs hook into one of several notches to set tension for panel weight, especially with decorative fronts.
Seat everything before testing travel: A link half seated in its pulley looks fine at rest and pops free under load.
Route new cables exactly as the old ones ran, using the photos you took before disassembly. If you skipped the photos, most manufacturers print routing in the technical sheet tucked behind the toe kick or available by model number. Guessing at routing is how a correct part produces a wrong result.
Where the DIY Boundary Sits
Some configurations belong to a technician, and recognizing them is a skill, not a surrender. Heavy torsion style springs, units that require partial cabinet removal for hinge access, and hardwired installations you can't safely isolate all raise the risk beyond a typical home toolkit. Integrated models add a furniture panel whose weight changes spring setup, and those doors shouldn't be operated without that panel fitted.
Reassembly ends with three checks. The door should open and close with even resistance and no sideways drift. The latch should engage only when the panel is fully flush, with the switch changing state at full engagement rather than early. A short rinse should leave the hinge side corners dry, since fresh hardware that sits a fraction off will leak there first.
The Stop Signs Most DIY Guides Leave Out
Plenty of tutorials treat a dishwasher door like a cabinet door with a rubber strip on it. It isn't. It's a load bearing assembly wrapped around hot water, mains wiring, sharp metal, and spring tension, and that combination creates situations where continuing costs more than stopping. Knowing those situations in advance keeps a Saturday project from becoming a floor replacement.
Maytag's guidance confirms that trapped silverware and protruding rack items can prevent sealing, while leveling problems, a non square tub, and damaged seals produce the same symptom, as outlined in Maytag guidance on dishwasher door leaks. Identical symptoms with very different risk levels is exactly why a stop and go framework matters.
Four Conditions That End the DIY Session
The door won't latch at all: Running a machine that can't confirm closure defeats the safety interlock. Never bypass the door switch to get through a load of dishes.
Water reaches wiring or disappears under the unit: A leak you can see is a nuisance. A leak traveling under flooring or toward electrical components is active damage.
The door drops suddenly: A failed spring or cable can pinch fingers and slam a loaded rack. That hardware is under tension and deserves respect.
The tub or cabinet looks twisted: Visible distortion means the opening the door must seal against no longer has its original shape. Parts won't correct structure.
Low risk work looks different. Removing a trapped utensil, cleaning and reseating a gasket, checking rack protrusion, and verifying level with the racks out are all reasonable homeowner checks. Pulling the appliance from cabinetry, correcting a bent door, handling heavy springs, and removing an integrated front panel sit on the other side of the line.
Field judgment: The cheapest repair is accurate diagnosis. A second gasket installed on a crooked tub is just a more expensive leak.
Why Remodels and Rentals Deserve Extra Suspicion
Fresh countertops, new flooring, and cabinet work all change how a dishwasher sits, sometimes by just enough to bind a panel or tilt a tub. Rental properties add seasonal cabinet movement and hurried installations to the mix. When a leak starts right after other kitchen work, suspect the installation before the appliance.
If you've hit a stop sign, or you'd rather hand off the risk, a local handyman service covers exactly this middle ground between appliance repair and cabinet adjustment. Homeowners across St. Charles, O'Fallon, Lake St. Louis, Chesterfield, Wildwood, St. Peters, and Ballwin run into these same door problems, often in kitchens where the cabinets moved and the dishwasher took the blame.
Putting It All Together and Getting Help Locally
The whole method compresses into an order you can reuse for any future symptom. Inspect the seal and gasket first, because it's visible and free. Move to the latch and alignment, feeling for even resistance and full engagement. Examine hinge, spring, and cable hardware for wear that adjustment can't fix. Finish by checking tub and cabinet level, the layer most guides skip and many leaks call home.
Replace only what your inspection condemns. A stretched cable, a cracked latch body, and a cut gasket all earn replacement. A clean gasket on a tilted tub earns a level and shims, not a parts order. When you fix dishwasher door problems in that order, the repair tends to stay fixed.
Verification is part of the repair, not an optional epilogue. Run a short empty cycle, watch the corners and lower edge, and confirm the latch holds without extra pressure from your knee. If the same symptom returns in the same place, treat that as new information. Something upstream in the sequence was missed, and repeating the last step louder won't change the outcome.
When Local Help Makes More Sense
Some doors cross the line from project to liability, and some households can't spare a dishwasher while parts ship and weekends fill up. Same week appointments keep meal prep and rental turnovers on schedule, and flexible financing helps when an appliance outage lands in the same month as everything else. It also makes sense to bundle a door repair with planned painting, fencing, or deck work when one crew is already trusted in the home.
If your door has a stop sign symptom, or your diagnosis points at cabinet and leveling work you'd rather not improvise, reach out through the contact page and describe what the door does, not just that it leaks. That detail helps the right parts and tools arrive on the first visit anywhere in St. Charles, O'Fallon, and the surrounding communities.
Most dishwasher door problems yield to an afternoon of careful checking. The rest have a clear, local path forward, and either way you're no longer guessing at parts in the dark.
If your dishwasher door is leaking, sagging, or refusing to latch, 1st Choice Home Repairs can diagnose the cause and handle everything from gasket and hinge replacement to the leveling and cabinet adjustments that make the repair last. Visit 1st Choice Home Repairs to schedule a same week visit and get your kitchen back to normal without risking your floors.
Comments