
Sink Stopper Stuck Quick Repair Guide

You're brushing your teeth, the faucet is off, and the basin is still holding a cloudy inch of water that won't go anywhere. You pull the little rod behind the faucet. Nothing moves. You push on the stopper with your thumb and it feels locked solid, so your hand is already reaching for pliers.
Stop there. When a sink stopper stuck in place gets yanked, pried, or twisted the wrong way, a cheap cleanout turns into a bent linkage, a scratched flange, or a leak under the cabinet. The fix that works in St. Charles area homes, old and new, starts with a quick diagnosis first, then the right release move for that exact mechanism.
What a Stuck Stopper Really Means
Standing water tells you something is blocking drainage, but it doesn't tell you what. A slow drain and a stuck stopper look alike from above, yet they live in different places. One is hair and soap narrowing the pipe. The other is a stopper that can't lift, can't seal, or can't move at all.
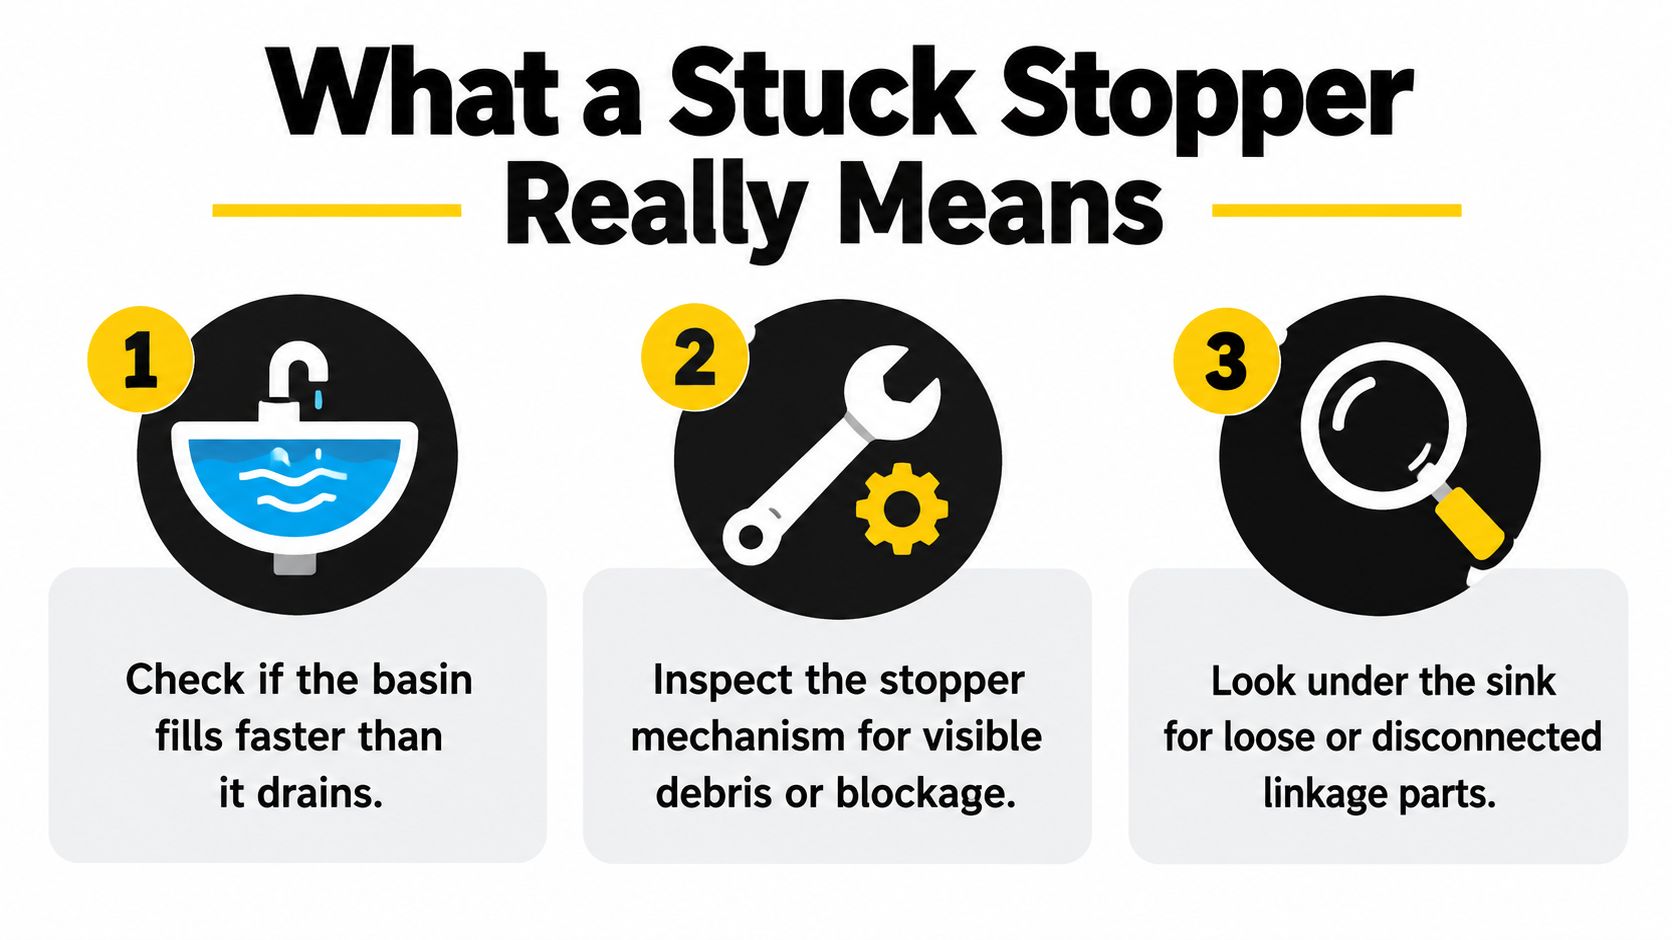
Run a little water and watch closely before you touch a tool. If the basin fills faster than it drains and the stopper sits flush and unmoving, the stopper itself is likely closed and held. If water slips slowly around the edges, debris may be packed around the stopper body or just below it.
The Three Checks That Decide the Job
Watch the water: Confirm whether water pools with no movement, drains slowly around the cap, or disappears when it should be held. Each pattern points to a different failure.
Work the control gently: Move the lift rod, push the cap, or try a quarter turn by hand. Note whether anything under the sink moves when you do it.
Look underneath: Shine a light on the pivot rod, retaining nut, clevis strap, and spring clip. A disconnected clip or a rod that doesn't travel explains most dead lift rods.
Practical rule: If the control on top moves but the stopper doesn't, the failure is in the linkage below, not in the cap you're staring at.
That distinction matters because force applied to the wrong end bends parts. A stopper held by its linkage won't respond to pulling from above, no matter how hard you pull. A stopper jammed with hair will often free up once it's released properly and cleaned.
There's a water cost to ignoring it, too. A stopper that won't seal lets a dripping faucet run straight through, and one stuck closed invites an overflow if someone leaves the tap on. The U.S. Environmental Protection Agency reports household leaks can waste about 180 gallons per week, or 9,400 gallons per year, for an average family. Those figures cover leaks broadly, not stoppers alone, but they show why a small fixture failure deserves prompt attention instead of a shrug.
Matching Your Stopper to the Right Fix
Most frustration comes from treating every stopper as the same plug. Bathroom and kitchen drains use several distinct mechanisms, and each one releases a different way. Identifying yours from above and below takes a minute and decides everything that follows.
The Four Families You'll Actually Meet
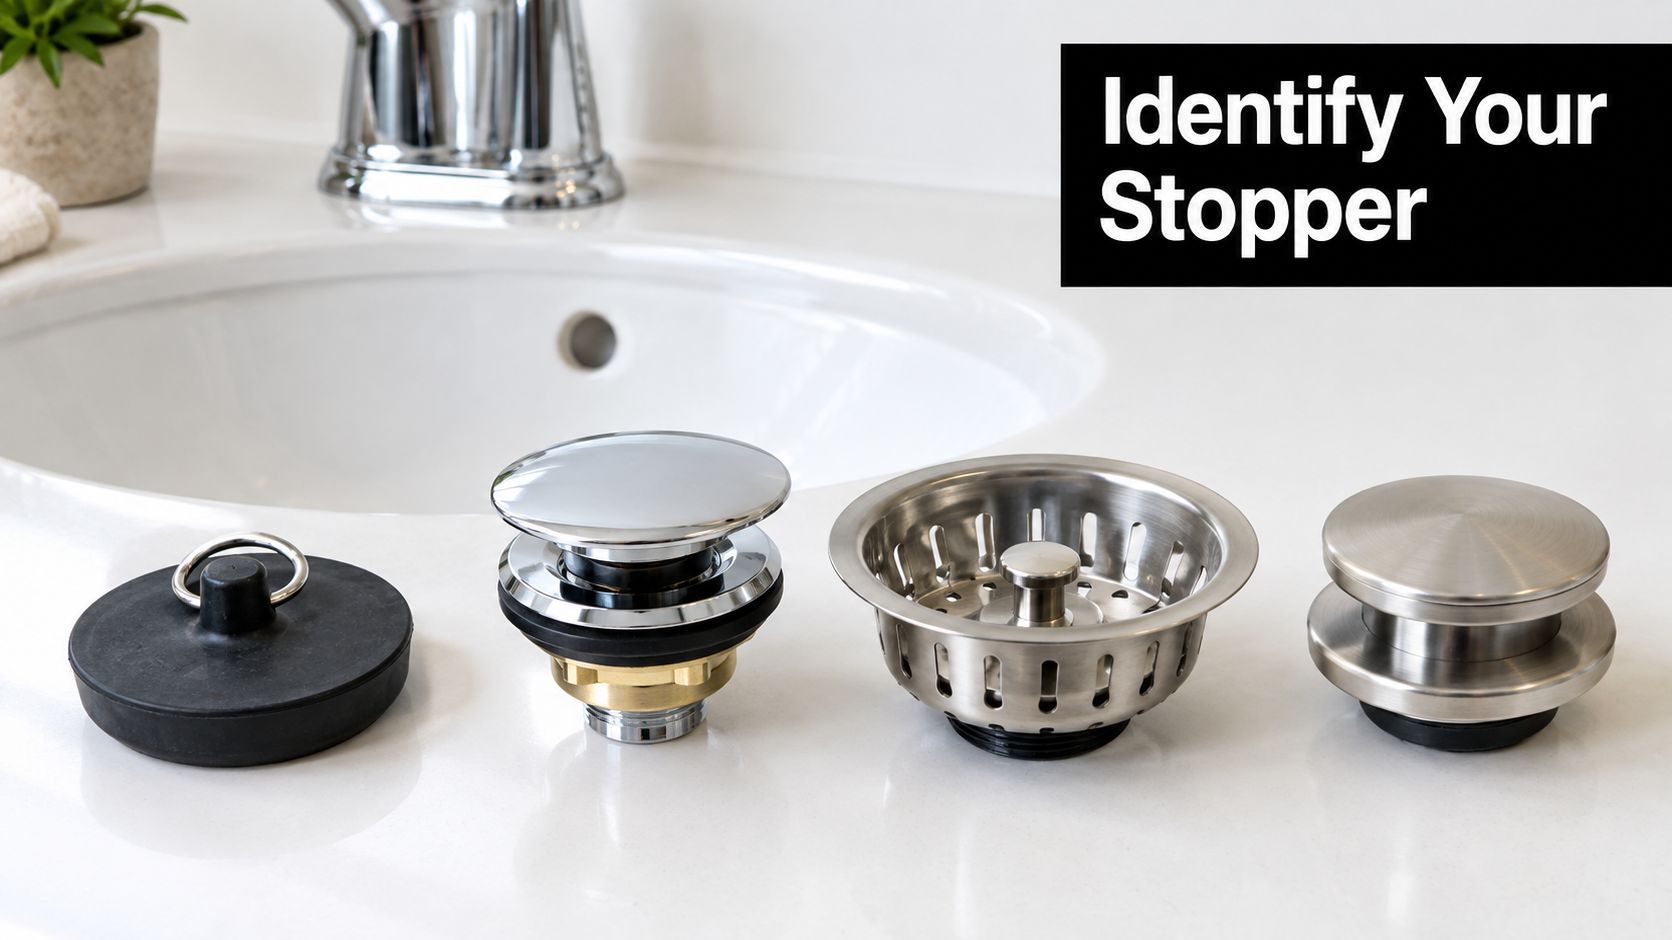
A pop-up assembly has a vertical lift rod poking up behind the faucet. Under the sink, that rod connects through a clevis strap to a horizontal pivot rod that enters the drain body. Pull the rod and the far end of the pivot rod lifts the stopper from inside.
A lift-and-turn stopper has no rod behind the faucet. You lift the cap slightly and rotate it to lock it open or closed, and many models hide a small set screw on the stem under the cap. A push-to-pop-up cartridge, sometimes called a clicker, works by pressing the cap itself. A kitchen basket strainer is a wider, cup-shaped insert that sits in a larger drain opening and often threads in from above.
This variety isn't new. The patent record for drain stopper devices includes a filing from October 27, 1933, issued October 9, 1934, and a pop-up stopper application dated January 20, 1960. Decades of designs mean a forty-year-old sink and a recent remodel may share almost no parts under the basin.
Three Failure Modes Behind One Symptom
Debris jam: Hair wraps the stopper stem, soap residue glues it to the drain seat, and the cap feels gummy or gritty when you try to move it.
Linkage lock: The pivot rod, clevis, or spring clip has seized, slipped, or disconnected, so the stopper is mechanically held even though the drain itself is clear.
Corroded seal or seat: Mineral scale and a cracked, brittle rubber seal keep the stopper from seating or releasing cleanly, and cleaning alone won't restore it.
Pulling or twisting the wrong design can damage the linkage, the drain flange, or the finish. Matching the mechanism first is not extra work. It is the work.
The diagnostic approach of identifying the stopper type before attempting removal separates a debris problem from a mechanical lock, and that one distinction tells you whether to reach under the sink, look for a set screw, or twist a cap counterclockwise. Once you've named your type and your failure mode, you're on the right repair branch.
Releasing a Pop-Up Stopper from the Underside
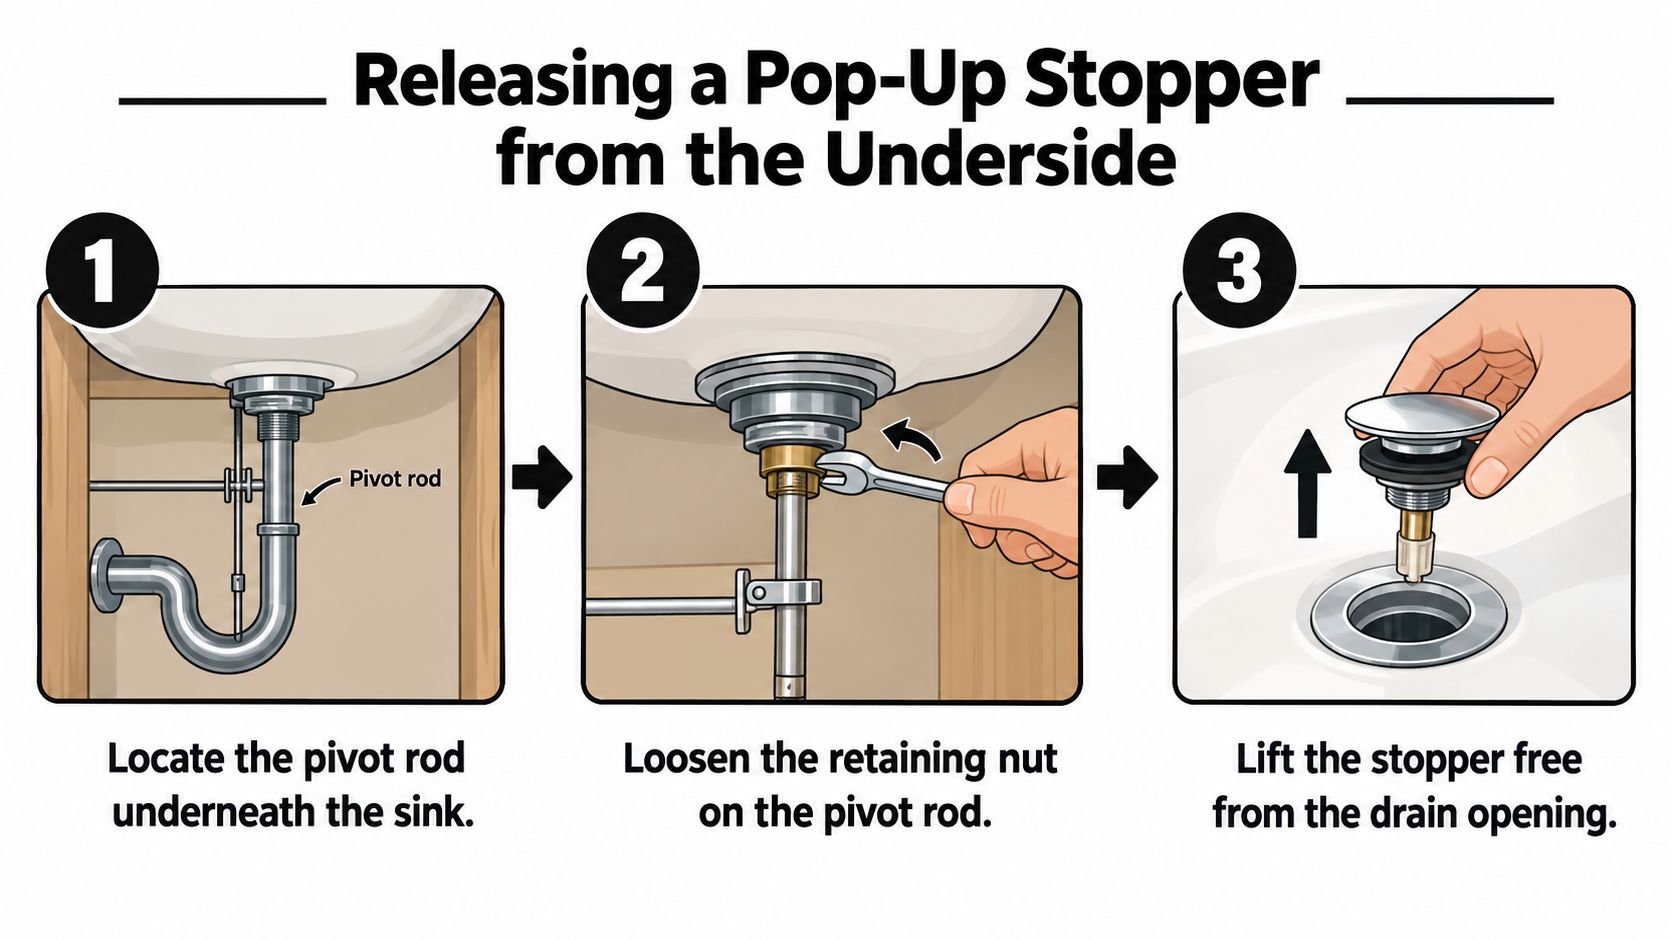
The pop-up is the most common bathroom setup and the one homeowners damage most often by hauling on the lift rod. The rod behind the faucet is thin, the clevis strap bends easily, and neither part is built to break a seized stopper loose. The controlled route goes underneath, where the mechanism connects.
Clear out the cabinet, lay a towel on the cabinet floor, and set a bucket under the drain and trap. Even a dry-looking drain body holds residual water, and it will find your sleeve. Keep a small brush, a flashlight, and a pair of channel-lock pliers within reach, though your hands should do most of this job.
The Component-First Release Sequence
Loosen the retaining nut: Find where the horizontal pivot rod enters the back of the drain body. Turn the pivot-rod retaining nut counterclockwise, by hand if it cooperates.
Withdraw the pivot rod: Slide the rod straight out while supporting the stopper from above with your other hand so it doesn't drop and chip the basin.
Lift the stopper vertically: With the rod clear, lift the stopper straight up out of the drain. Straight up, no rocking, no prying against the flange.
Check the loop if it resists: If the stopper won't lift, its lower loop is probably still engaged with the rod. Confirm the rod is fully withdrawn instead of adding upward force.
That sequence, set out in the iFixit guide for sink drain pop-up stopper replacement, separates a jammed stopper from its linkage without stressing the drain flange. It's slower than yanking by about a minute, and it saves the parts you'd otherwise replace.
Before you start scrubbing, watch the underside work done once at normal speed so the hand positions make sense.
Clean, Inspect, and Reassemble
Pull the hair off the stopper stem first. It's usually a tight, felted ring, and it's the main reason the stopper dragged. Scrub the stopper, pivot rod ball, clevis, and drain seat with a small brush, using vinegar or a mild cleaner where mineral scale has built up.
Inspect the rubber seal while it's in your hand. If it's cracked, flattened, or brittle, replace the stopper or seal rather than adjusting around it. A dead seal will leak no matter how carefully you set the linkage.
Reinsert the stopper with its loop aligned to catch the pivot rod, slide the rod back through, and thread the retaining nut on again. Tighten only enough to retain the rod while the linkage still moves freely. Over-tightening binds the ball and makes the lift rod feel stiff.
Run several full open and close cycles, then fill the basin partway and watch underneath. If the drain flange weeps at the basin surface, smearing sealant around the outside won't fix it. The flange needs to come out so the silicone or plumber's putty underneath it can be renewed.
Handling Lift-and-Turn, Push-Pull, and Basket Strainers
Not every stuck stopper answers to a pivot rod. Rentals in St. Peters and older homes around St. Charles are full of caps that look identical from above and release in completely different ways underneath. Treating each one on its own terms keeps you from snapping a stem or scarring a finish.
Lift-and-Turn Stoppers and the Hidden Set Screw
On a lift-and-turn, set the stopper to its open position first, lifted and rotated so it stays up. Feel around the stem under the cap for a small set screw. On many models you back that screw out slightly, then unscrew the cap and stem assembly by hand.
Vintage versions sometimes hide the screw lower, and mineral crust can fill the socket so your hex key won't seat. Pick the crust out gently and take your time. If the screw head starts to round, stop, because a stripped set screw turns a simple removal into a drilling job.
Push-Pull Cartridges That Twist Free
A push-to-pop-up cartridge usually releases from above. Grip the cap and rotate counterclockwise while lifting, and the cartridge unthreads from the drain body. Use a rubber jar gripper or a cloth for traction instead of pliers, which chew through chrome and brushed finishes fast.
When these stick, the culprit is often grit and scale in the spring mechanism rather than a hard jam. Work the cap up and down a few times as you turn. Resistance that suddenly goes solid means you're turning against a stop, not through threads, so recheck the type before forcing it.
Kitchen Basket Strainers
The basket strainer is the odd one out, wider and shallower, usually threaded into the drain from above and sometimes secured with a locknut underneath. Mineral buildup at the threads is the usual reason it won't budge. Steady counterclockwise pressure with both hands, plus a vinegar soak at the seam, beats a wrench on the basket crossbars.
If your kitchen drain work is part of a bigger refresh, the kitchen services at 1st Choice Home Repairs cover the cabinetry and fixture work that often surrounds a strainer replacement. Keep the stopper job scoped first, though. A strainer that threads out cleanly rarely needs the full drain assembly disturbed.
Stopper-Type Release at a Glance
Stopper Type | Release Method | Primary Tool | Stop Sign |
|---|---|---|---|
Pop-up with lift rod | Remove pivot rod under sink, lift from above | Hands, channel-lock pliers if needed | Stopper won't lift after rod is out |
Lift-and-turn | Back out set screw, unscrew cap | Hex key or small screwdriver | Set screw head rounding off |
Push-to-pop-up | Rotate cap counterclockwise and lift | Rubber gripper or cloth | Cap turns but never unthreads |
Basket strainer | Unthread from above, loosen locknut if fitted | Hands, vinegar for scale | Basket flexes instead of turning |
The logic stays the same across all three. Find the release point, apply gentle torque in the right direction, then clean and reseat without over-tightening. If a part flexes, creaks, or suddenly feels springy, you're loading something that isn't the thread.
Choosing the Right Cleaner Without Damaging the Finish
With the parts on a towel, the instinct is to grab the strongest bottle under the sink. Resist it. Stopper assemblies mix chrome, brass, plastic, and rubber in one small stack, and a cleaner that's fine on one material can eat another.
Pantry Staples That Do the Real Work
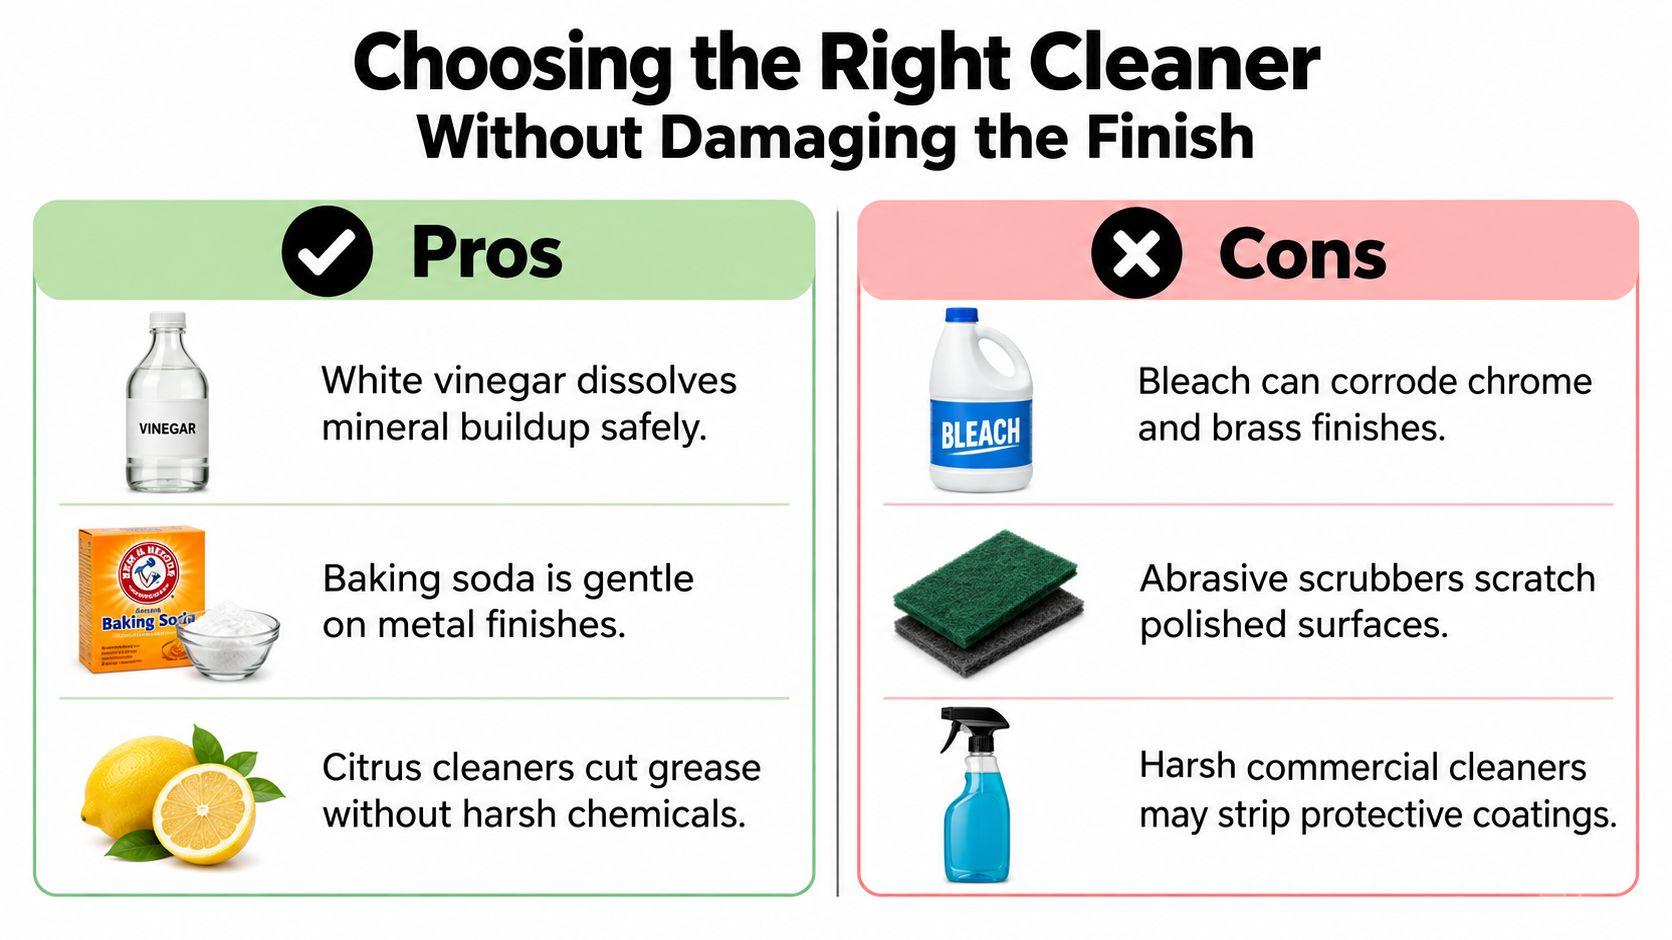
White vinegar handles the mineral side of the problem. It dissolves scale on pivot rods, stopper stems, and drain seats without attacking chrome, which makes it the right soak for crusty metal parts. Warm it slightly if you like, and let the parts sit while you scrub the drain opening.
A paste of baking soda and dish soap handles the organic side. It cuts soap scum and the slimy film that coats plastic stopper bodies and stainless strainers, and it rinses clean. Work it in with an old toothbrush, not a metal brush, since stiff wire bristles score polished flanges and leave rust-prone scratches behind.
Where Commercial Cleaners Fit, and Where They Don't
Use them narrowly: A commercial drain cleaner belongs in the trap for a hair clog below the stopper, not as a soak for the stopper parts themselves.
Protect rubber and brass: Harsh chemicals shorten the life of seals and can discolor brass components you're trying to reuse.
Mind the splash risk: Chemical cleaner sitting in a closed trap can splash back when you open the assembly, so don't pour it in right before disassembly.
Shop habit: Vinegar in one container, baking soda paste in the other, and the commercial bottle stays capped unless the trap itself is clogged. That covers nearly every stopper cleaning job without gambling on the finish.
One more surface deserves care. The underside of the drain flange seals against the basin with silicone or putty, and no cleaner or sealant smeared from above reaches that joint. Clean the flange face gently for appearance, but treat any leak at that seam as a reseat job, not a scrubbing job.
When to Stop and Call a Professional
More force does not equal more progress under a sink. Most expensive stopper outcomes start as minor ones, right up to the moment someone puts a wrench on a corroded nut and gives it one last hard turn. The nut rounds, the drain body twists, and now the flange seal is broken too.
Warning Signs That End the DIY Attempt
Cracked or flexing flange: If the drain flange moves when you work the stopper, or you can see a crack, further torque spreads the damage.
Rounded or frozen hardware: A retaining nut that deforms under pliers, or a set screw that strips, needs extraction tools and patience, not a bigger wrench.
Water where it shouldn't be: Staining or swelling on the cabinet floor, or a drip at the trap after reassembly, means a joint isn't sealing and shouldn't be tightened blindly.
A stopper that won't seat: Wobble at the cap after cleaning points to a worn seat, bent stem, or failed seal that adjustment won't cure.
Run a simple decision check after any reassembly. Does the linkage move freely through full cycles without binding? Does the flange stay dry while the basin holds water? Does the stopper seat flat and hold that water when closed?
If any answer is no, a second attempt with more force rarely changes it. Drain the trap into your bucket, leave the parts finger-tight, and take a photo of the assembly for whoever comes next. That photo saves the next person, possibly you, from guessing how the clevis and clip were arranged.
The handyman services from 1st Choice Home Repairs handle exactly this handoff point, the small fixture repair that's revealed corrosion, a leaking trap, or a cabinet floor that needs attention. Calling at the first stop sign keeps the visit short. Calling after the flange cracks turns it into a drain assembly replacement.
There's no prize for finishing a repair that's fighting you. Knowing your stop point is part of doing the job right, and on old plumbing it's often the cheapest decision you'll make all weekend.
Local Help from 1st Choice Home Repairs
A stuck stopper is a small job with a habit of introducing you to bigger ones. You fix the drain, then notice the trap weeping, the cabinet floor softening, or the faucet dripping into the bargain. Having one local team that handles the follow-up work keeps those discoveries from becoming separate service calls.
1st Choice Home Repairs is a full-service home improvement and appliance repair company with 25 years of hands-on experience. The team serves St. Charles, O'Fallon, Lake St. Louis, Chesterfield, Wildwood, St. Peters, Ballwin, and nearby communities. That's the same mix of older homes with original drain hardware and newer builds with cartridge stoppers described throughout this guide.
What the Same Team Can Take On
Appliance repair: Washer, dryer, dishwasher, and oven repair for the breakdowns that don't wait for a convenient week.
Handyman and fixture work: Sink drain repair, leaks, damaged traps, and the punch-list items landlords and sellers need handled promptly.
Larger projects: Interior and exterior painting, fencing, and decking when a repair visit turns into a planned upgrade.
The full range of services at 1st Choice Home Repairs lays out that scope, along with the company's approach of transparent, upfront pricing and attentive craftsmanship. Flexible financing options are available, which helps when an urgent fix and a planned project land in the same month.
Try the diagnosis and the repair sequence first. Most stuck stoppers in this area are a pivot rod, a brush, and a bucket away from working again. If you hit a stop sign, a frozen nut, a cracked flange, a leak that survives reassembly, you already know which local number handles the stopper and whatever it uncovered.
If your stopper is still stuck, the linkage is corroded, or a simple cleanout turned up a leaking trap or damaged flange, 1st Choice Home Repairs can finish the repair and handle the appliance, handyman, painting, fencing, or deck work behind it. Visit 1st Choice Home Repairs to request service in St. Charles, O'Fallon, St. Peters, and surrounding communities, and get upfront pricing before any work begins.
Comments