
How to Clean Cement Driveway

A dark oil spot sits beneath the car, green growth is filling the joints, and a quick blast from the garden hose hasn't changed much. That's a common driveway problem. Concrete is porous, so oil, soil, mildew, and organic residue can move below the visible surface instead of staying on top where rinsing can remove them.
The safest way to clean a cement driveway combines the right treatment for the stain, controlled pressure, adequate water flow, and consistent technique. This guide explains how to clean cement driveway surfaces without etching them, which chemicals deserve caution, when lower-pressure cleaning makes more sense, and when a professional restoration service is the practical choice.
Why Your Cement Driveway Needs Regular Cleaning
A driveway can look clean from the street while contamination is already working into the slab. Tire marks collect at turning points, oil drips gather beneath parked vehicles, and shaded areas develop dark organic staining. Concrete is porous, so soil, oil, mildew, and plant residue can move below the surface. A garden hose may rinse away loose dirt without removing what has penetrated the material, as explained in Concrete Network's concrete driveway cleaning guidance.
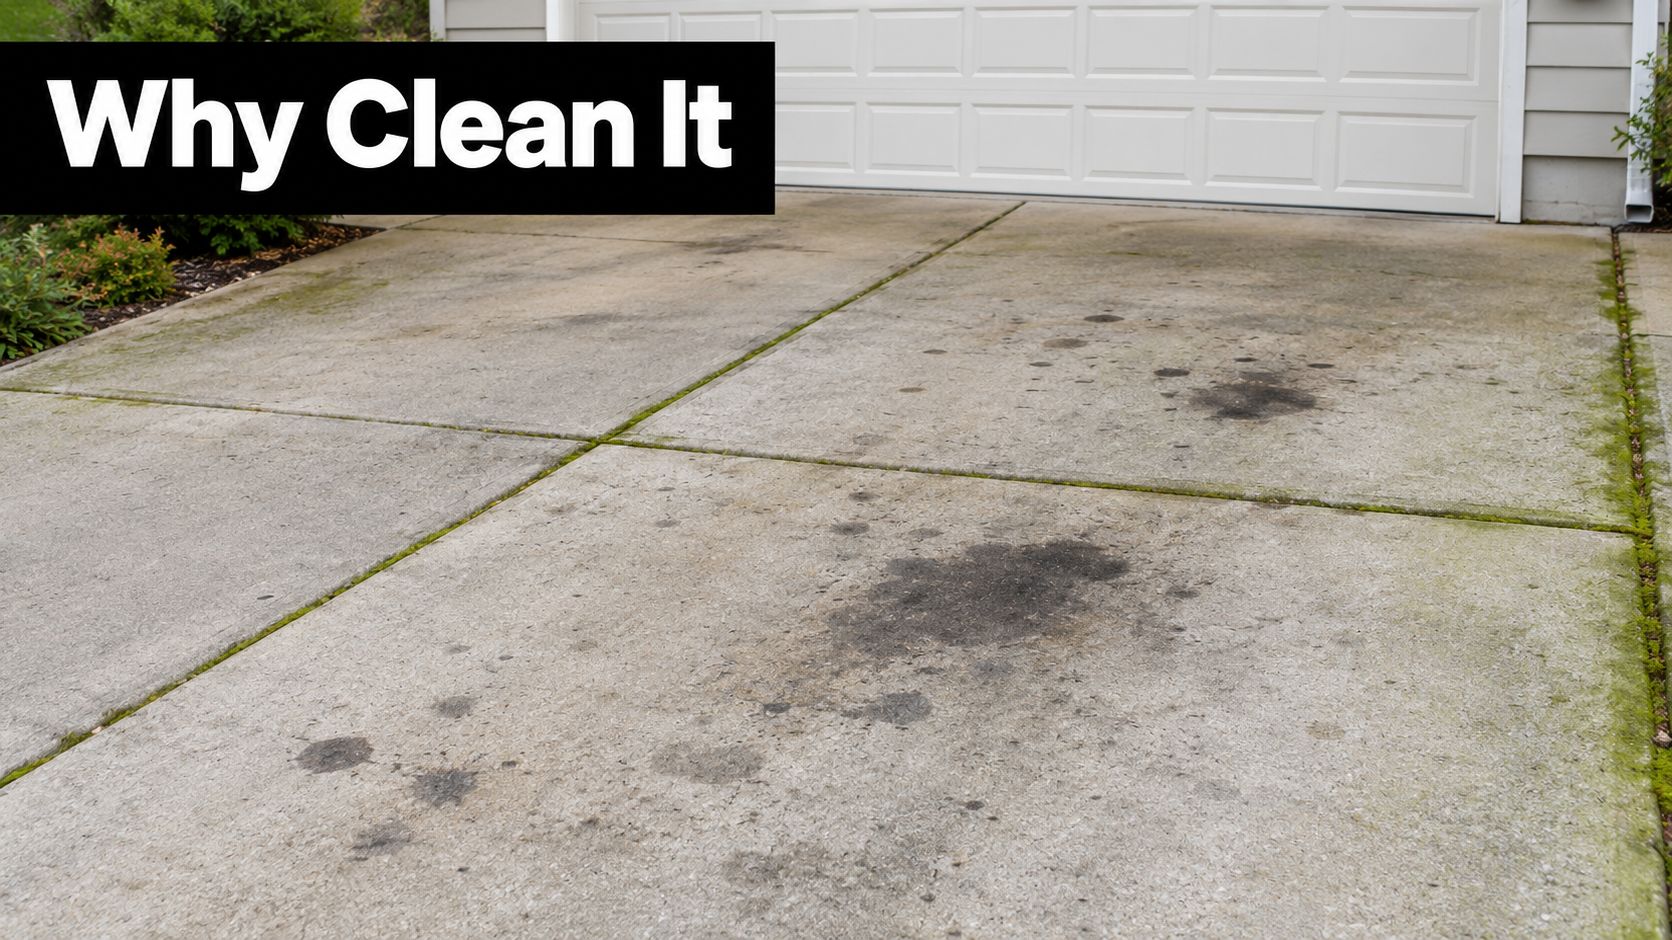
Appearance is only part of the problem. Organic residue keeps concrete damp, while oil and grime can leave lasting discoloration. Seasonal moisture can enter existing cracks or weak areas and contribute to gradual deterioration. Cleaning will not repair structural damage, but it exposes cracks, failed joints, and drainage problems before dirt conceals them.
Start with diagnosis, not the pressure washer
Walk the entire driveway before choosing equipment or chemicals. Identify the contamination first:
Oil and grease: Dark, irregular patches commonly appear beneath vehicles and near the garage.
Tire marks: Black or gray arcs usually form where a vehicle turns while stationary.
Mildew and algae: Green, brown, or black growth favors shaded, damp sections.
Rust: Orange-brown marks may come from metal furniture, tools, or irrigation residue.
Surface wear: Flaking, exposed aggregate, cracks, and crumbling edges may require repair instead of aggressive washing.
The diagnosis determines whether you need a degreaser, biological treatment, brush, pressure washer, or combination. Maximum pressure is a poor substitute for correct identification. On worn concrete, it can remove the weak surface paste, expose aggregate, or leave visible wand marks. Use a pressure setting and water flow suited to the slab, test an inconspicuous area, and stop if the surface begins to etch.
A scheduled clean costs less than neglect
Travelers Canada recommends thorough concrete cleaning at least once a year to remove dirt, grime, and stains (Travelers Canada's concrete driveway maintenance guidance). Regular cleaning is easier to control than a delayed restoration job. Fresh surface dirt generally needs less chemical action and less mechanical force than contamination that has remained in the pores.
A cleaning routine also creates an opportunity to inspect expansion joints, cracks, drainage paths, and pooling water. Sweep loose debris regularly, absorb oil as soon as practical, and remove wet leaves or organic material before they remain on the slab for long periods. Homeowners can also use local home repair resources when planning related maintenance.
Practical rule: Clean the stain you have, not the driveway you wish you had. A broom-finished slab, an older repaired slab, and a decorative surface require different pressure and chemical choices.
Gathering the Right Materials and Equipment
A driveway can look ready for washing while loose gravel, toys, hoses, or planters remain in the spray path. Move vehicles and furniture first. Sweep or blow away leaves, soil, and small stones. A pressure washer can launch debris, drive grit into joints, or turn a simple cleaning job into a surface-repair problem.
Set out a stiff outdoor broom, garden hose, bucket, concrete-safe cleaner or degreaser, stiff nylon brush, and absorbent material for fresh oil. Add a pressure washer only when the slab and operator can handle it. For broad areas, a flat-surface cleaner usually gives more even coverage than a hand wand, reducing the chance of visible stripes from inconsistent passes.
Choose chemicals by contamination
Start with the mildest product that matches the stain. A pH-neutral concrete cleaner suits general dirt and routine upkeep. Oil and grease call for a concrete-safe degreaser. Mildew or algae may need a product formulated for organic growth. Protect nearby plants, and follow the label for dilution, dwell time, and rinsing.
Acid-based products require a higher level of control. They may help with mineral deposits or some rust-related marks, but they can change the surface, affect decorative finishes, and cause damage if they dry or remain unrinsed. Don't reach first for muriatic acid because a stain looks stubborn. A concrete-specific product matched to the contaminant is a safer starting point.
Never combine bleach, acids, degreasers, or other cleaners unless the label expressly permits the mixture. Reactions can produce dangerous fumes, damage the slab, and harm landscaping. Keep containers separated while you work.
Check the washer before you start
Pressure and water flow work together. Concrete Network's pressure and flow recommendations lists driveway machines commonly ranging from 1,500 to 3,300 PSI, with about 3,000 PSI and 4 GPM described as an efficient combination for rinsing grime from concrete pores.
For ordinary residential cleaning, a practical starting range is 2,000 to 3,000 PSI. Use the lower end for older, repaired, decorative, or uncertain surfaces. Concrete Network's concrete cleaning equipment guide places standard residential guidance around 2,500 to 3,500 PSI, with approximately 3,000 PSI and at least 3 GPM as a benchmark.
Treat those figures as operating limits, not a target to exceed. A narrow nozzle held close can etch concrete even when the machine rating appears appropriate. Wear eye protection, waterproof boots, gloves suited to the chemical, and clothing covering exposed skin. Keep children and pets away, and check where dirty runoff will flow before pulling the trigger.
Choosing Your Cleaning Method for Different Stains
A driveway covered in loose dust needs a different treatment from one marked by oil, rust, or algae. Choosing the wrong method creates avoidable problems: water can spread oil, a strong jet can stripe the surface, and an unsuitable chemical can bleach or weaken the concrete. Identify the contaminant and inspect the slab before treating the whole area. Test the method in a small, inconspicuous spot first.
Method | Best For | Equipment Needed | Typical Results |
|---|---|---|---|
Basic wash | Loose soil, dust, light residue, and routine upkeep | Broom, hose, bucket, mild concrete cleaner, nylon brush | Improves appearance without aggressive mechanical action |
Pressure washing | Embedded dirt on sound concrete and broad flat areas | Pressure washer, suitable nozzle, hose, optional surface cleaner | Removes widespread grime efficiently when distance and passes remain consistent |
Degreaser application | Oil, grease, and dark vehicle-related spots | Concrete-safe degreaser, brush, absorbent material, rinse equipment | Breaks down oily residue, though older stains may need repeated treatment |
Targeted stain removal | Rust, stubborn organic marks, tire transfer, and isolated discoloration | Stain-specific cleaner, test area, brush, controlled rinse | Concentrates effort on the contaminant and limits unnecessary pressure |
Treat oil with chemistry before pressure
Fresh oil should be absorbed before water reaches it. Apply an absorbent material to lift surface oil, then use a concrete-safe degreaser and agitate with a stiff nylon brush. Follow the product's dwell time, and keep it wet enough that it does not dry onto the slab.
Old oil often reaches below the surface. Pressure alone may spread the stain or brighten the surrounding concrete while leaving the center dark. Repeat the degreaser treatment when the label allows it. A narrow nozzle at close range can remove surface paste without removing the oil below it, leaving a visible patch and a rougher texture.
Match treatment to organic and mineral stains
Mildew, algae, and moss usually loosen more readily after a suitable cleaner has been applied. Scrub small patches by hand. For growth across a shaded section, apply the cleaner over the affected area, protect nearby plants, prevent harmful runoff, and rinse thoroughly.
Tire marks often respond to a mild cleaner, brushing, and a controlled rinse. Rust needs a concrete-compatible rust remover, not a general degreaser. Test the product away from view, then follow its handling and rinsing directions. Acidic products can etch or discolor concrete if they are too strong, left too long, or allowed to dry.
Let surface condition set the pressure
Sound, broom-finished concrete tolerates more cleaning than a slab with flaking paste, exposed aggregate, decorative coloring, or a failing sealer. Consumer Reports' pressure washer surface guidance notes that concrete driveways can generally withstand powerful cleaning, while excessive pressure or a nozzle held too close can etch the surface.
For ordinary, sound concrete, a washer in the 2,000 to 3,000 PSI range can suit general cleaning when paired with adequate flow. Around 3,000 PSI and 3 GPM provides a practical working benchmark, while the lower end is safer for older or repaired slabs. Use broad, even passes rather than concentrating force on one mark.
If the surface shows loose material, visible repairs, decorative coloring, or sealer failure, begin with scrubbing and a controlled rinse. A slower stain-specific treatment is preferable to removing the driveway's original texture. The cleanest-looking result is not a success if it leaves etching, exposed aggregate, or a permanent lighter stripe.
Step-by-Step Pressure Washing Techniques
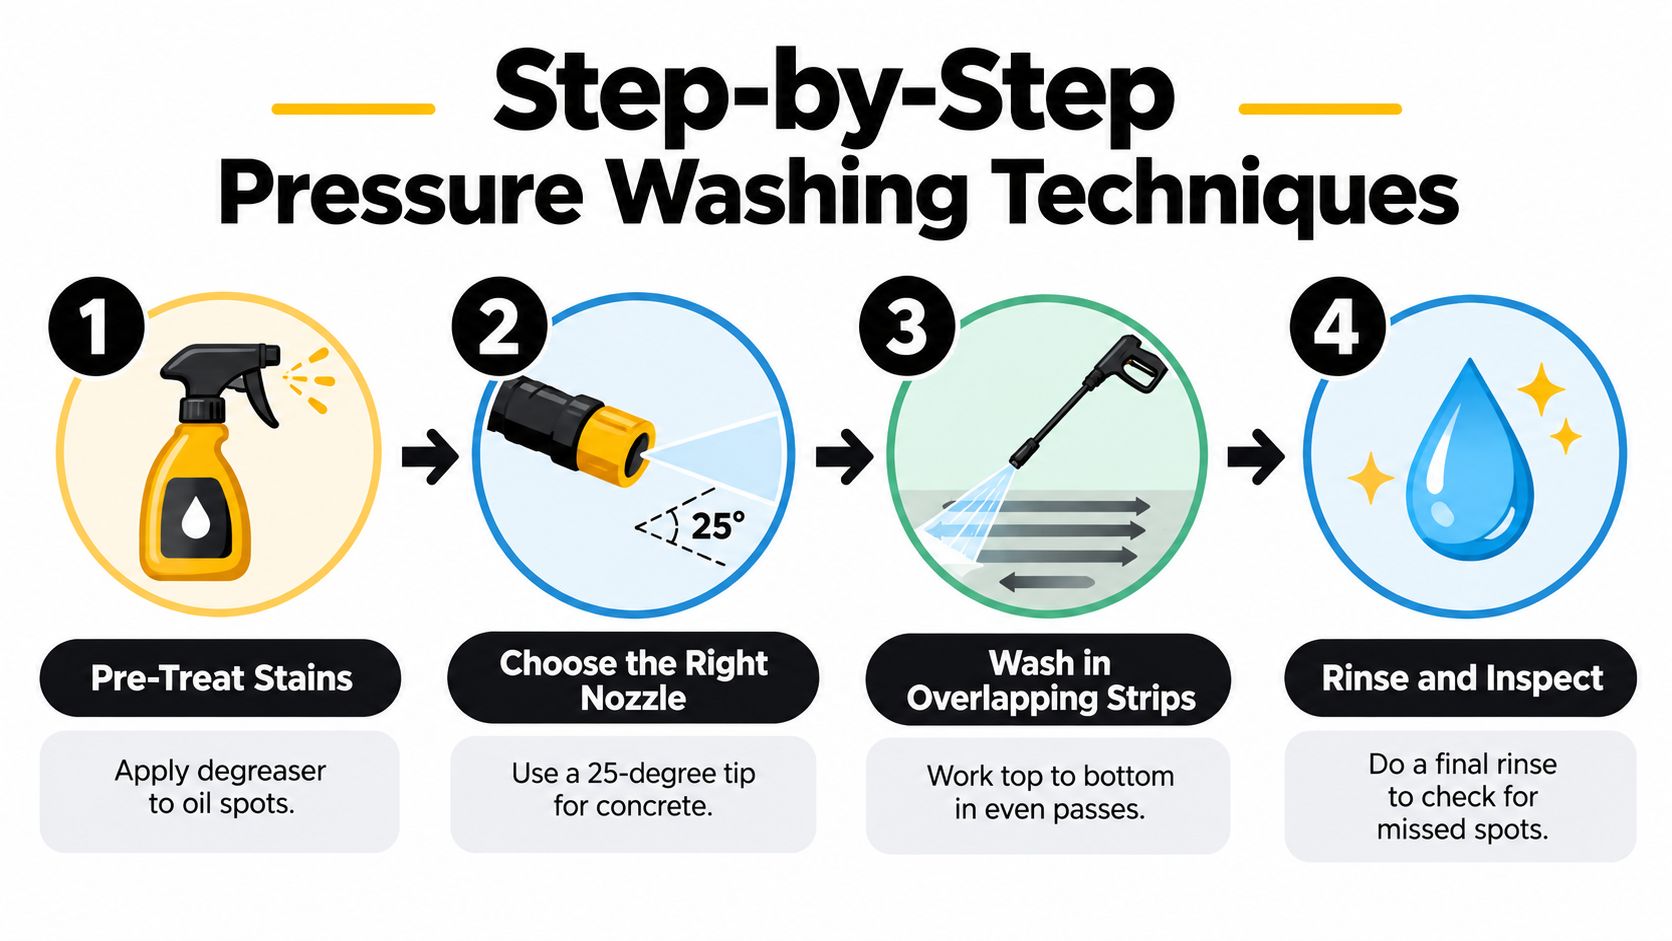
A driveway can look clean after pressure washing yet still suffer permanent damage from a nozzle held too close. Treat the job as controlled surface cleaning. Clear the area, protect nearby materials, and pre-treat stains before starting the main wash. If the concrete was newly poured, wait at least 30 days before pressure washing so the slab can cure and its surface paste is less vulnerable to removal, as outlined in Concrete Network's equipment guidance for concrete cleaning.
Set the pressure and nozzle deliberately
For a standard residential cement driveway, set the washer within 2,500 to 3,500 PSI. A practical working setup is approximately 3,000 PSI and at least 3 GPM, provided the concrete is sound and the operator keeps the spray moving. Start at the lowest effective setting, particularly on old, repaired, decorative, or previously damaged slabs.
A 25-degree nozzle is a sensible starting point for ordinary concrete. Keep the wand about 12 inches from the surface, hold it at a consistent angle, and move at a steady pace. Follow the washer manufacturer's operating guidance as well as the equipment rating. Avoid a zero-degree tip for routine driveway cleaning. Its narrow stream can etch concrete quickly if it pauses over one mark.
Surface damage usually comes from concentrated, uneven cleaning. A steady, wider spray held at a controlled distance is safer than a narrow jet held close.
Test an inconspicuous area first. After the test patch dries, check for changed texture, pale streaks, exposed aggregate, or lines that remain visible. If any appear, reduce pressure, widen the spray, increase the distance, or switch to scrubbing and rinsing. A slower process protects the slab's original finish.
Wash in a pattern that controls runoff
Start at the highest point and work downward. Use overlapping passes to prevent narrow strips of dirt from remaining between cleaned sections. Random movement produces uneven color and makes it difficult to judge whether an area has received enough cleaning.
For broad flatwork, a surface cleaner can improve consistency because its rotating spray bars distribute water across a contained area. Use the wand around edges, joints, corners, and isolated stains. Keep it moving. Pre-treatment followed by a second controlled pass is safer than holding the wand over one dark mark until it disappears.
Use this sequence:
Clear and sweep: Remove loose debris, then wet sensitive nearby surfaces if the product instructions require it.
Pre-treat: Apply a concrete-safe degreaser to oil and a suitable cleaner to organic staining.
Allow dwell time: Follow the product label and prevent the chemical from drying.
Begin high: Wash from the upper end toward the lower end with overlapping passes.
Detail the edges: Use controlled wand movements around joints and borders.
Rinse fully: Remove suspended dirt and chemical residue before assessing the finish.
Pre-treatment matters because pressure carries away loosened contamination more effectively than it breaks down oily or biological material. If the first pass lightens a stain but leaves a shadow, repeat the appropriate spot treatment instead of raising pressure across the entire driveway. Increasing force can remove the stain and the concrete's surface texture together.
The video below provides a visual reference for controlled driveway-cleaning technique.
Rinsing, Drying, and Evaluating Results
A driveway can look clean while wet and still dry with detergent film, oil shadows, or streaks. The final rinse removes suspended dirt and chemical residue that can attract fresh soil, irritate nearby plants, or leave the finish uneven. Work from the high end toward the low end, directing runoff away from garages, doors, planting beds, and neighboring surfaces.
Use a broad spray pattern and controlled pressure rather than a concentrated jet. Move steadily, keeping the nozzle far enough from the concrete to avoid etching the surface. Rinse expansion joints, broom grooves, borders, and low spots carefully because dirty water often collects there. Keep rinsing until the runoff is clear and no suds or cleaner remain.
Inspect after the surface has dried
Allow the concrete to dry fully before judging the result. Wet concrete can hide discoloration and make inconsistent cleaning appear uniform. Inspect it in ordinary daylight from several angles, checking whether each mark has disappeared, faded, or spread into a larger shadow.
Use this evaluation list:
Look for stripes: Bands usually point to uneven wand speed, distance, or overlap.
Check the texture: Roughness, pale etching, or loose aggregate indicates excessive pressure or an unsuitable cleaning method.
Inspect the edges: Dirt often remains where the washer could not reach safely.
Review the runoff path: Residue should not sit in joints or against landscaping.
Separate stain from damage: An oil shadow may need targeted chemistry, while missing surface paste requires repair assessment.
If a stain remains, let the area dry enough to identify the material before treating it again. Use only a product suited to that stain, test it in a small area, and rinse thoroughly afterward. Raising pressure across the whole driveway can remove the mark along with the concrete's surface texture.
Follow the sealant manufacturer's post-cleaning guidance before sealing. The slab must be free of cleaner, oil, and moisture. Otherwise, the sealer may bond unevenly or trap the problem beneath its film.
Preventative Maintenance and Sealing Strategies
A small oil leak beside the garage can become a dark, embedded stain after weeks of traffic and weather. Leaves, soil, and standing water create different problems. Organic debris can hold moisture against the slab, while repeated freeze-thaw exposure and poor drainage can worsen small defects. Preventative care reduces those risks before another pressure-washing session becomes necessary.
Sweep loose debris regularly, remove wet leaves before they sit, and absorb vehicle spills as soon as possible. Rinse visible buildup with a garden hose or a controlled washer setting rather than increasing pressure across the entire slab. Record the equipment's PSI and GPM, then stay within the range appropriate for the concrete, nozzle, and surface condition. High pressure can strip weak paste, expose aggregate, or leave wand marks that sealing will not hide.
An annual deep clean is a practical baseline for many driveways, with additional spot treatment after spills or heavy organic buildup. Travelers Canada's annual maintenance recommendation also supports yearly concrete cleaning. Adjust that schedule for shade, drainage, traffic, climate, and the driveway's condition.
Seal only clean, dry concrete
Sealer limits how readily water and staining materials enter the surface, but it cannot repair cracks, replace missing concrete, or correct water that repeatedly pools. Remove cleaner and residue, allow the slab to dry fully, and check for peeling, weak areas, cracks, and incompatible coatings before applying anything.
A penetrating sealer suits owners who want water resistance with little change to the concrete's appearance. An acrylic sealer forms more of a surface film and may provide color enhancement or a more noticeable finish. The right product depends on the existing finish, exposure, vehicle traffic, and the manufacturer's compatibility instructions. Read the product's coverage, drying, and recoat requirements rather than choosing by appearance alone.
Do not seal over an unresolved oil mark or biological growth. The coating can make later treatment harder and preserve an uneven appearance. Test the product in a discreet area first, especially on stamped, stained, or previously sealed concrete.
Build a maintenance calendar
After spills: Absorb oil promptly, then use a stain-specific treatment and rinse it away.
During routine upkeep: Sweep grit and remove organic debris before moisture and traffic press it into the slab.
Annually: Clean thoroughly and inspect joints, cracks, drainage, and surface texture.
Before sealing: Confirm that the concrete is clean, dry, sound, and compatible with the selected product.
For related exterior upkeep: Coordinate driveway work with decking maintenance and repair.
Sealing can reduce future cleaning effort, but it will not solve poor grading or a leaking vehicle. Correct the source of recurring water or contamination first.
When to Call Professionals for Driveway Restoration
DIY cleaning is reasonable when the driveway is a manageable size, the concrete is sound, the stains are familiar, and you can control the equipment safely. Bring in a professional when oil has spread through the slab, decorative finishes are involved, sections are crumbling, buildup is widespread, or an old sealer is peeling and needs removal.
The cost of doing the work yourself includes more than machine rental. Account for hoses and fittings, stain-specific chemicals, protective equipment, plant protection, cleanup time, and the risk of paying for concrete repairs or correction of wand marks. A contractor may also use a commercial surface cleaner, which helps produce a more consistent finish across a broad driveway.
Know when cleaning is no longer the whole job
Request an assessment when:
The surface is flaking or spalling: Pressure can remove additional weak material and expose a repair problem.
Oil has penetrated: Repeated household treatments may fade the mark without removing the contaminated concrete.
The driveway is decorative: Stamped, stained, and exposed-aggregate concrete require methods that protect the finish.
The slab has unknown coatings: An incompatible cleaner or sealer can leave cloudy, peeling, or uneven areas.
You see structural concerns: Large cracks, settled sections, crumbling edges, and drainage faults need more than washing.
The area is difficult to control: Tight access, sensitive landscaping, and runoff restrictions raise the risk of collateral damage.
A contractor should treat pressure as a surface-risk decision, not choose the strongest setting. Excessive pressure, a narrow spray pattern, or holding the nozzle too close can etch the cement paste and leave visible cleaning marks. Ask what pressure and flow they plan to use, how they will adjust the method for weak or decorative concrete, which chemicals they recommend, and how they will protect nearby property.
Ask whether the crew uses a surface cleaner for flatwork, tests a small area first, and separates cleaning from sealing or repair in the written quote. Review driveway and exterior service options, then request a scope that names the cleaning method, expected result, and limitations.
A professional cannot guarantee that every old oil stain will disappear. An honest assessment should explain whether cleaning, stain reduction, resurfacing, or repair is the sensible choice. The goal is a cleaner, safer-looking driveway without sacrificing texture or creating damage that costs more than the original stain.
1st Choice Home Repairs offers pressure washing for hard surfaces, including driveway cleaning with commercial surface cleaners and professional-grade pressure washers. For an assessment of your cement driveway and its cleaning options, visit 1st Choice Home Repairs to discuss the project.
Comments