
How Do I Fix a Dishwasher: DIY Repair Guide

You've opened the dishwasher after a full cycle and found dirty plates, cloudy glasses, or a pool of water at the bottom. Maybe the control panel is completely dead, or there's water on the kitchen floor and no obvious place where it came from. Before ordering a pump, control board, or heating element, identify the symptom precisely. A dishwasher that looks broken may only have a clogged filter, restricted hose, stuck float, blocked spray arm, or confused sensor.
The practical answer to “how do I fix a dishwasher” starts with diagnosis, not parts. Work from the outside in, test the simplest failure points first, and stop whenever electricity, gas-like burning odors, or hidden water damage creates a safety risk.
Preparing for Safe Dishwasher Troubleshooting
A dishwasher combines mains electricity, pressurized water, heat, sharp metal edges, and wet flooring in one compact cabinet. If the machine has leaked, begin by protecting the floor and isolating the appliance before you remove a panel or reach below the tub.
Make the appliance safe first
Switch off the dishwasher at the circuit breaker, not just the control panel. A dark display doesn't prove that the appliance is electrically dead. If the dishwasher plugs into an accessible outlet, unplug it as well, but don't pull a built-in unit out across a wet floor.
Close the dishwasher's water shutoff valve, usually located beneath the sink or behind the lower access panel. Keep towels and a shallow container nearby because water can remain in the inlet hose, sump, or drain line even after the cycle has stopped.
Safety rule: De-energize the dishwasher at the breaker and shut off the water supply before disassembly.
If you smell burning plastic, see scorched wiring, notice melted insulation, or find that the breaker trips again after resetting, don't keep testing the appliance. Those symptoms can indicate an electrical fault rather than a blocked filter, and repeated resets can increase the hazard.
Use tools that answer questions
You don't need a workshop full of specialist equipment for initial checks. Gather:
A flashlight: Look beneath the tub, around hose connections, and inside the sump.
A multimeter: Test continuity and resistance after power has been isolated.
A non-contact voltage tester: Confirm whether a circuit or conductor is energized before touching it.
Screwdrivers and nut drivers: Remove common access-panel fasteners without damaging them.
Work gloves: Protect your hands from broken glass, cutlery, and sharp cabinet edges.
Towels and a shallow pan: Control residual water instead of allowing it to reach wiring or flooring.
A soft brush and mild detergent: Clean filters and spray-arm openings without gouging plastic.
A voltage tester tells you whether power is present. A multimeter helps you investigate a component once the appliance is safely de-energized. Neither tool makes energized testing safe for an inexperienced homeowner. If you aren't comfortable identifying live terminals, leave electrical measurements to a qualified technician.
Record the machine before opening it
Photograph the model and serial label, usually found along the inner door edge or frame. Take pictures of hose routing, connector positions, and panel placement before disconnecting anything. Manufacturers use different filter locks, float designs, error displays, and control sequences, so the model number prevents you from applying the wrong procedure.
Remove dishes and racks carefully. If water is standing in the tub, scoop it out with a cup or use a wet/dry vacuum designed for liquid pickup. Don't reach into a garbage disposal with your hand while checking the dishwasher drain connection. Use a tool or isolate the disposal and follow its manufacturer instructions.
Diagnosing the Actual Problem Before Replacing Parts
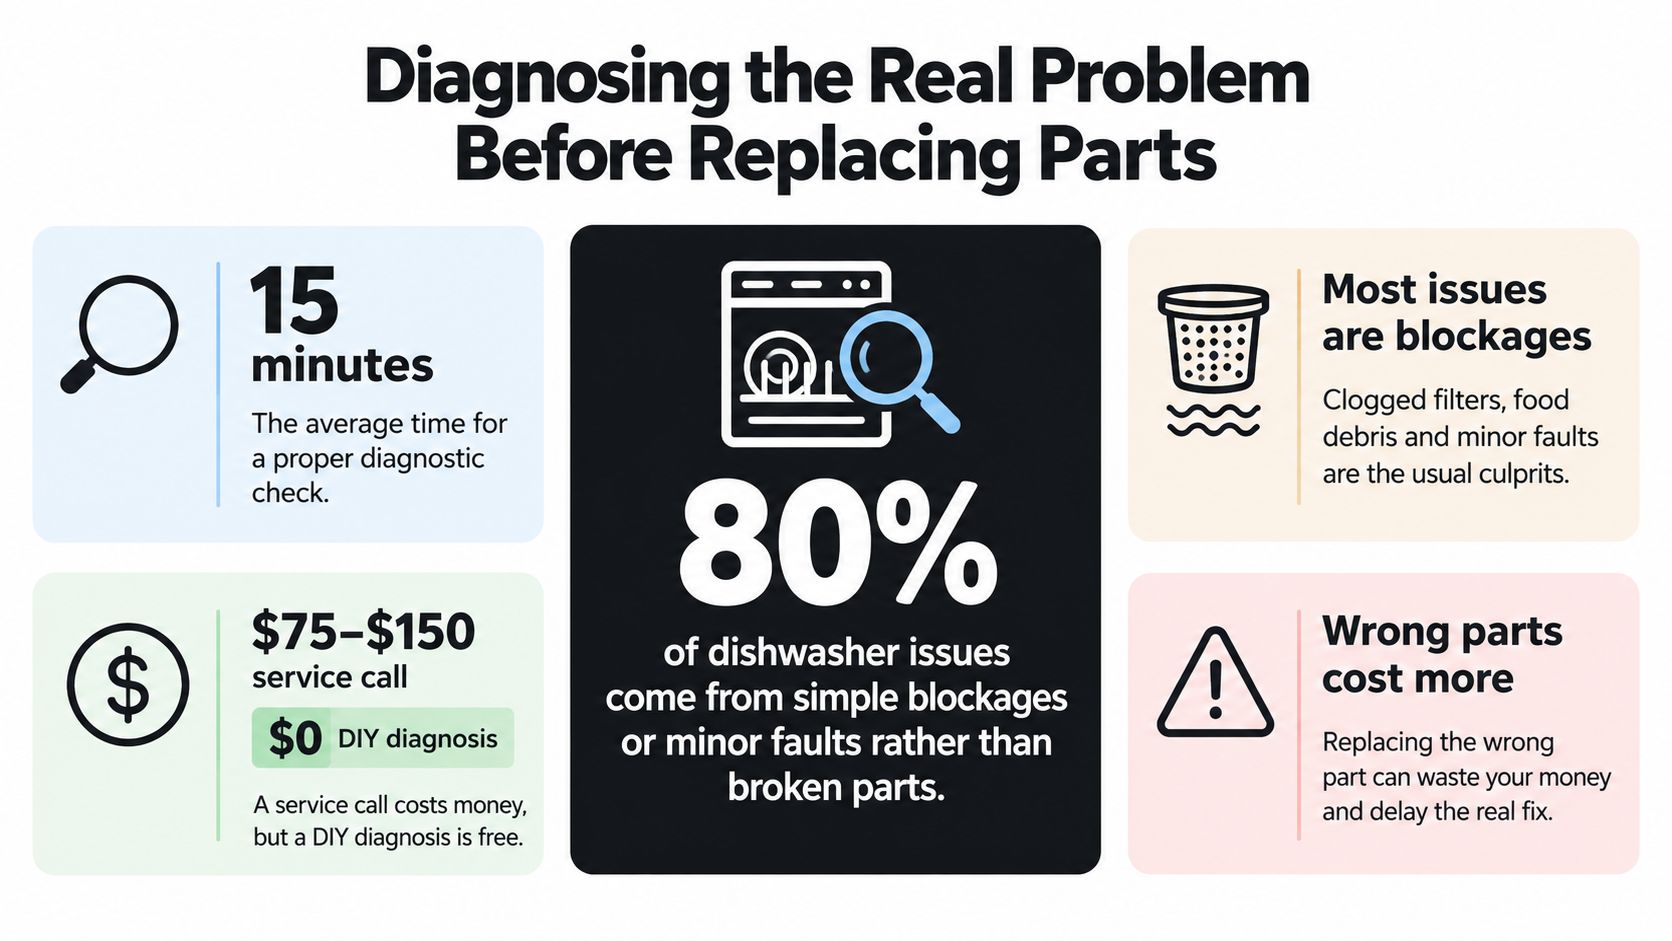
Replacing parts before locating the fault wastes money. A new drain pump will not remove food packed into a filter, and a control board will not fix a door that fails to close firmly enough to engage its latch. Start with one question: where is the symptom occurring?
A survey of common appliance problems and repairs covering more than 125,000 members found that dishwasher complaints focused mainly on performance. Poor cleaning accounted for 11%, poor drying 9%, poor draining 7%, control-panel failure or malfunction 7%, leaks 6%, and broken dish racks 5%. Those patterns direct your first checks toward filters, spray arms, drain paths, heating systems, seals, racks, and controls rather than the main motor.
Separate tub water from floor water
Standing water inside the tub and water on the floor indicate different problems, even though both are often called a “leak.”
What you see | Start with | Why it matters |
|---|---|---|
Water remains in the tub | Filter, sump, drain hose, pump path | The machine may not be draining |
Water appears on the floor | Door seal, hose connection, float, tub area | The cabinet or a connection may be leaking |
Dishes are dirty but the tub is mostly empty | Filters, spray arms, fill level, water temperature | Wash circulation or heat may be weak |
The panel is dark and silent | Breaker, outlet, switch, latch, control path | The appliance may not be receiving power |
The machine hums but water doesn't move | Obstruction, pump, motor, or restricted flow | A sound alone doesn't identify a failed pump |
A dry floor with water left in the tub usually indicates a drainage restriction. Check the filter, drain hose, pump opening, and plumbing connection that receives the discharge. A blocked filter or kinked hose can create the same symptom as a failing pump, so inspect these accessible points before ordering a replacement.
Floor water requires a different approach. Dry the area completely, run a short supervised cycle, and watch for the first point where moisture appears. Water at the lower door corners directs attention to the gasket, latch alignment, or spray pattern. Moisture beneath the appliance may come from an inlet hose, drain connection, pump seal, float response, or tub component.
Let the symptom set the order of checks
For poor cleaning, inspect the coarse and fine filters first. Then confirm that the spray arms rotate freely and that their openings are clear. A large plate or utensil can prevent rotation, while food debris can reduce spray pressure without damaging the wash pump.
Poor drying calls for checks of heating and drainage. Water left in the tub can look like a heating failure because the final rinse never fully leaves the machine.
For an unresponsive control panel, confirm mains power before opening the door or lower panel. A tripped breaker, blown fuse, failed wall switch, loose connection, door latch, or control fault can produce the same visible symptom. Check those possibilities in order rather than assuming the electronic board failed.
Historical appliance-failure research also identifies pumps, electronics, inlet valves, foreign objects, and doors as recurring dishwasher problem areas. According to the peer-reviewed research summarized by Consumer Reports' appliance mishap guidance, pumps were repaired in about 58% of cases and electronics in about 44%. The practical implication is straightforward: clear obstructions and inspect accessible components before replacing a sealed pump assembly or electronic control. If the symptom remains after those checks, component testing or professional diagnosis is more sensible than continued part swapping.
Fixing the Most Common Dishwasher Failures
A dishwasher that will not start, leaves water behind, or produces dirty dishes may have a failed component. It may also have a blocked filter, restricted hose, stuck float, or incorrect setting. Diagnose the simple causes first. Replacing a pump or control board before proving the fault wastes money and can introduce new leaks or wiring problems.
When the dishwasher won't start
Begin at the supply point, not inside the appliance.
Check the breaker or fuse. Reset a tripped breaker once. If it trips again, stop using the dishwasher and arrange electrical diagnosis.
Verify the outlet. Use an approved tester or a known-working appliance only when the area is dry and safe.
Check the wall switch. Built-in models may use a switched outlet or dedicated wall switch that can fail separately from the dishwasher.
Inspect the control path. Isolate power, then look for loose connectors, damaged wiring, or heat marks around the terminal block and control area.
Check the door latch. The control will not start a cycle unless the latch switch confirms that the door is closed.
Test relevant components. With the appliance de-energized, repair guidance recommends checking the timer motor with a multimeter. A reading of about 3,300 ohms is the reference given in that guidance. The industry repair statistics guidance also places power and the control path before deeper diagnostics.
A child-lock setting or delayed-start function can make a working dishwasher appear dead. Check the model-specific manual for the correct button combination. Do not force the controls or condemn the electronic board until those settings and the supply have been confirmed.
When water remains in the tub
Standing water hides the actual condition of the filter and sump. Isolate power first, remove the water, then lift or twist out the coarse and fine filters as the manual directs. Wash them under running water with a soft brush. Inspect the sump for glass, labels, bones, plastic fragments, and other objects that can restrict the pump.
Follow the drain hose to its sink connection or disposal inlet. Look for a sharp kink, crushed section, loose connection, or low routing that lets dirty water flow back into the tub. If the dishwasher drains through a garbage disposal, inspect the connection without reaching into the disposal.
The float switch must move freely. It reports the water level, and a stuck float can interrupt filling or create an abnormal cycle. Keep the diagnosis focused on accessible causes before replacing major parts. Practical kitchen repair guidance can also help organize maintenance and basic checks.
A clear filter and hose do not prove that the pump is healthy. If the pump hums while water remains, it may contain an obstruction or have a worn motor. If it runs, investigate its electrical supply, a seized motor, or an internal impeller fault. Access beneath the tub often involves electrical connections and water seals. Stop at that point unless you can isolate power, test safely, and reseal the connection correctly.
When dishes come out dirty
Start with water movement and loading. If the model allows it, remove each spray arm, rinse it, and clear blocked jets with a soft brush or wooden toothpick. Do not drill the openings or force metal wire through them. Changing the jet pattern can reduce washing performance.
Inspect the filter again, even when it looks only lightly soiled. Restriction reduces circulation and allows loosened debris to recirculate. Load plates so they do not block the lower arm, keep tall pans from stopping the upper arm, and spin both arms by hand before starting the cycle.
Measure the water temperature during the first fill with a suitable thermometer, provided you can do so safely. Expert guidance identifies water below 140°F as a reason to investigate the heating element and recommends checking fill and drain behavior as well. A cold fill can leave detergent ineffective and soil attached to dishes. Possible causes include the heater, thermostat, control, or inadequate hot-water supply.
Use the detergent amount suited to the product and your water conditions. Too much can leave residue, while too little may not remove grease. If the filters are clean, the arms are open, the loading is correct, and the water is hot enough, the wash pump or a sensor-controlled cycle may need professional testing.
The useful distinction is simple: clear flow problems before condemning the pump. A blocked filter is visible and inexpensive to address. Pump replacement makes sense only after the dishwasher has power, the drain path is open, the float operates, and the pump has been tested.
Tackling Odd Noises and Modern Smart Sensors
A dishwasher's sound gives you a clue, but it isn't a diagnosis. A low hum during draining may come from a pump trying to move water through an obstruction. A grinding sound can indicate a foreign object near the impeller or wash-pump assembly. Rattling may be a loose utensil, a spray arm striking an oversized dish, or a rack component vibrating against the tub.
Listen to when the noise occurs. Noise during filling points toward the inlet valve or water supply. Noise during washing directs attention to spray arms, circulation, and objects in the sump. Noise during draining points toward the drain pump, drain hose, or a blockage. Switch the cycle off before opening the door, and don't put your hand into a moving or recently heated machine.
If removing the filters and visible debris doesn't change a grinding noise, don't keep running cycles to “see if it clears.” An object can damage an impeller, and a worn bearing can turn a small noise into a pump failure. At that point, the useful next step is controlled inspection, not stronger chemicals or repeated resets.
Sensors can imitate mechanical failure
Modern dishwashers increasingly combine connected controls, water-saving systems, quiet operation, and sensor-guided cleaning. A recent dishwasher market report describes the category as being reshaped by connected-home adoption, AI-integrated cleaning, water-saving technologies, and ultra-quiet systems. It projects market growth from about USD 34.39 billion in 2025 to USD 35.68 billion in 2026, which helps explain why troubleshooting now includes software and sensor behavior as well as pumps and hoses.
A sensor glitch can produce a short cycle, an unexpected pause, an error message, or a refusal to start. Before opening the control housing, record the displayed code and the exact point where the cycle stops. Then consult the model-specific manual for a reset procedure, check whether the door is fully latched, clean accessible filters and sensors, and verify that the water supply is open.
A hard reset can clear temporary control confusion, but it won't repair a failed sensor, damaged wiring, blocked pump, or leaking base. If the unit reconnects to an app, check for a documented firmware or connectivity issue through the manufacturer's support channel. Don't install unofficial software or repeatedly power-cycle a machine that has tripped a breaker or shown evidence of overheating.
A reset is a diagnostic step, not proof that the control board is healthy.
Smart features also change the repair decision. A newer appliance may be mechanically sound while a sensor, communication module, or control interface misbehaves. Conversely, an app can report a cycle error while the actual cause is still a blocked filter or inadequate fill. Confirm physical conditions before blaming software.
Evaluating Repair Costs and Calling a Professional
A dishwasher that leaves water on the floor may need a pump, or it may have a loose hose connection. A machine that stops mid-cycle may have a failed control, or a blocked filter and poor water flow. The repair decision starts with proving which situation you have, not ordering the first part suggested by the symptom.
Call a professional when risk, access, or diagnostic confidence makes continued testing unsafe. Cleaning a filter, checking an exposed hose, or freeing a spray arm is reasonable after disconnecting power and water. Testing a live control panel, opening a sealed pump housing, or working around a water-damaged base requires the right tools and experience.
Consumer Reports places the median appliance repair cost for surveyed problems at about $142 in its repair and failure overview. Use that figure as a reference, not a promised local price. Access, travel, parts, model design, and the number of faults found can change the final invoice.
Compare the work, not just the invoice
DIY is more appropriate when | Professional service is more appropriate when |
|---|---|
The filter is blocked | The breaker trips repeatedly |
The drain hose is visibly kinked | You smell burning or see scorched wiring |
A spray-arm opening is clogged | The pump or motor needs replacement |
The gasket is accessible and clearly damaged | Water continues to appear beneath the unit |
The issue follows a documented reset | The control board or wiring requires testing |
A visible, inexpensive fix can still miss the fault. After cleaning a filter or clearing a hose, run a supervised cycle. Confirm that the dishwasher fills, circulates, drains, and completes the program without water reaching the floor. If the symptom returns, record what changed and what did not. That information helps a technician avoid repeating basic checks and replacing parts without evidence.
Treat electrical warnings as stop signs
Dishwasher recall history shows why electrical symptoms deserve immediate caution. Consumer Reports has documented large dishwasher recall actions, including GE units recalled after reports of overheated wiring caused by a short circuit, in its appliance mishap and repair coverage.
A warm connector is not automatically a recall condition, but burning smells, melted insulation, visible arcing, or repeated breaker trips are reasons to stop. Turn off the breaker, close the water supply, and do not run another cycle until a qualified person has inspected the appliance.
For homeowners in St. Charles, O'Fallon, and nearby communities, 1st Choice Home Repairs' appliance and handyman services are one local option when the problem extends beyond filter cleaning and hose checks. A technician can assess electrical faults, persistent leaks, inaccessible pumps, and installation issues, then explain whether repair or replacement makes practical sense.
Stop point: If you cannot prove the dishwasher is de-energized, do not continue with internal testing.
Implementing Preventive Maintenance for Longevity
A dishwasher that leaves grit on plates may have a failing pump, but it may also have a blocked filter or restricted spray arm. Preventive maintenance helps separate those conditions before you buy a replacement motor, heater, or control board. The routine is straightforward: keep the drain path open, check moving parts, and record changes in performance.
Build a simple maintenance rhythm
Use this schedule as a starting point, then follow the appliance manual where it gives different instructions.
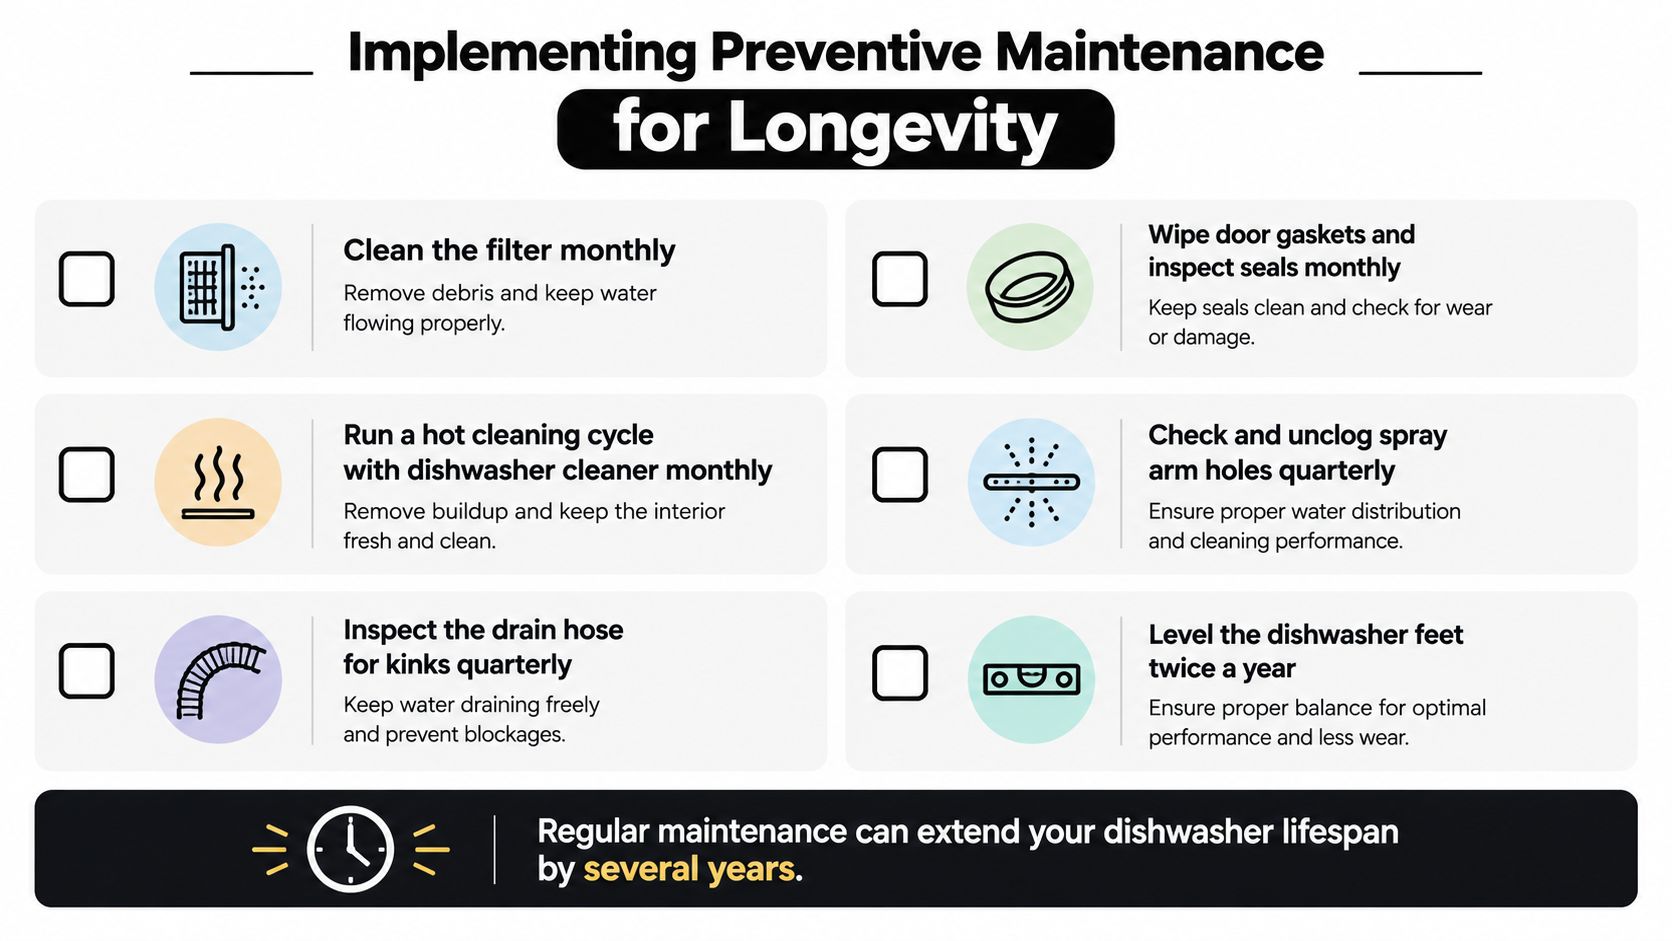
Clean the filter regularly. Remove the coarse and fine filters, rinse away grease and food particles, and brush the mesh gently.
Inspect the sump. Check for glass, labels, bone fragments, or plastic that could enter the pump.
Check spray arms. Make sure each arm turns freely and that its openings are clear.
Wipe the door gasket. Remove residue with a damp cloth and inspect the seal for splits, flattening, or deformation.
Examine the drain hose. Confirm that it is not kinked behind the cabinet or sagging in a way that lets dirty water flow back.
Run an appropriate cleaning cycle. Dishwasher cleaner can remove buildup, but follow the product and appliance instructions. Do not combine chemicals.
Expert guidance specifically prioritizes filter and drain-path inspection, free float-switch movement, sump and hose checks, and water-temperature measurement before major parts are replaced.
Load for circulation, not capacity
Keep large trays and pans away from the lower spray arm. Angle bowls so water can reach their interiors, and prevent utensils from falling through the rack into the arm or pump area. Scrape heavy food from plates, while leaving the machine to handle ordinary residue.
Pay attention after cleaning. A new grinding sound, slower drainage, a damp door edge, or greasy dishes provides useful diagnostic evidence. The first change is easier to investigate than a later failure involving the pump, heater, seal, or control system.
If recurring buildup continues, check water temperature, detergent quantity, loading, and the incoming supply before ordering parts. A filter that blocks again quickly or water that returns after draining points to a possible plumbing or component fault. Local providers can also handle dishwasher repair and kitchen maintenance when the unit must be removed from a tight installation.
The aim is not to turn every homeowner into a technician. It is to recognize routine cleaning, isolate simple restrictions, and act early when symptoms persist. That approach protects the appliance and reduces parts replacement based on guesswork.
If the dishwasher still will not drain, start, clean properly, or stop leaking after these checks, contact 1st Choice Home Repairs for appliance diagnosis and repair in St. Charles, O'Fallon, and surrounding communities. Their team handles dishwasher and kitchen repairs and can explain the likely fault before repair or replacement is chosen.
Comments