
Can I Paint Bathroom Tiles: What Really Works in 2026

Yes, you can paint bathroom tiles, and a properly prepared painted finish may last approximately 3–8 years. It works best on dry, sound, low-splash surfaces, while shower floors and constantly wet walls are usually poor candidates.
So why do so many painted-tile projects peel, bubble, or turn soft within a short time? The problem usually isn't the idea of painting tile. It's treating a slick, moisture-exposed surface like an ordinary drywall wall.
Can I Paint Bathroom Tiles and Should I
Can you paint bathroom tiles and expect the finish to hold? Yes, in the right moisture zone, with the right coating system and a fully sound, dry substrate. The job becomes a poor bet when the tile faces constant water, standing moisture, heavy abrasion, or movement beneath the surface.
A painted backsplash or vanity splash zone is usually a sensible refresh. A shower floor is a far more demanding surface. It takes standing water, body oils, cleaners, grit, and foot traffic, often at the same time. Those conditions expose weak adhesion quickly.
Glazed ceramic and porcelain are difficult substrates because their smooth, low-porosity faces give ordinary paint little to grip. They require thorough cleaning, light abrasion, a bonding primer, and a coating made for tile. Even with careful preparation, the original factory glaze will generally outlast the replacement finish. This zone-by-zone guide to preparing and coating bathroom tile explains why lower-wear wall areas are better candidates than surfaces exposed to standing water.
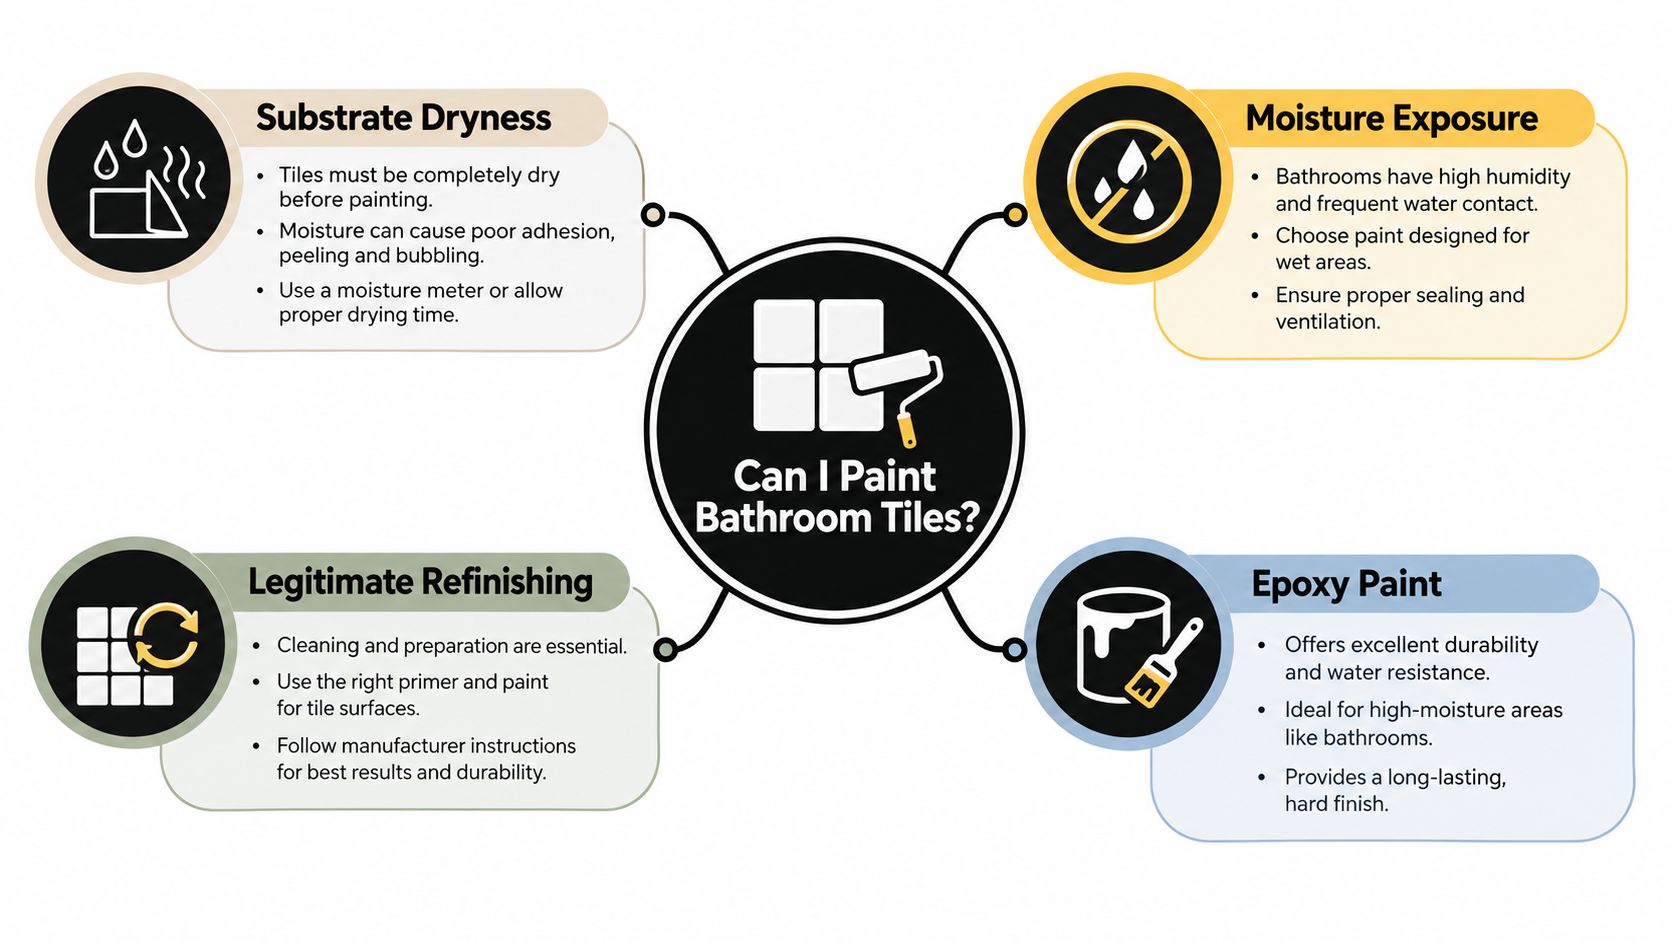
Judge the bathroom by moisture zone
Backsplash: Usually the most forgiving location. It gets splashes rather than continuous immersion or foot traffic. A compatible tile coating can perform well if the grout, corners, and edges are stable.
Vanity splash zone: A good candidate when the tile is sound and water does not sit around the basin. Faucet bases and countertop joints need careful sealing because those edges often admit water first.
Full shower surround: A cautious choice. Vertical shower walls face repeated water and steam, so use a system specifically rated for that environment. Expect gentler cleaning and more frequent inspection than with bare glazed tile.
Floor: The highest-risk zone. Floors take abrasion, grit, wet feet, dropped objects, and repeated cleaning. Shower and tub floors should stay unpainted unless the product is specifically rated for heavy traffic or immersion.
The hard distinction is paint versus a coating system. Ordinary wall paint may look fine initially, but it lacks the hardness and moisture resistance of a two-part epoxy or epoxy-acrylic product. The primer, coating, tile condition, ventilation, and curing conditions must all suit the location.
Do not paint when:
The tile, grout, or joints are not completely dry.
Tiles are loose, cracked, hollow-sounding, or lifting.
The area has persistent moisture, poor ventilation, or unresolved leaks.
Failed caulk, mildew, soap film, or old coatings cannot be removed fully.
The bathroom cannot remain unused while the coating cures.
If any item points to a substrate or moisture problem, painting only hides the repair and leaves the new finish fighting conditions it cannot overcome.
What to Know Before You Open a Paint Can
Before choosing a colour, ask a harder question: is the tile a sound, dry surface that can hold a coating in this bathroom zone? A backsplash beside a well-sealed basin has different demands from a shower wall or a floor exposed to grit and wet feet. Inspect the area with its moisture pattern in mind, not as if every tile behaves the same.
Test the substrate, not just the surface
Run your hand over the tile and grout. Look for swelling, soft joints, staining around edges, and caulk that has pulled away. A clean-looking tile can still have moisture behind it, especially where a shower wall, countertop joint, or plumbing penetration has allowed water into the assembly.
A simple plastic-sheet check can flag a questionable area. Tape clear plastic tightly over the tile or grout and leave it undisturbed long enough to see whether condensation forms beneath it. This does not diagnose a leak, but it shows that the surface needs further investigation before coating.
Tap each tile lightly with a screwdriver handle. A consistent, solid sound is reassuring. A noticeably hollow sound can indicate debonding or a void beneath the tile. Paint cannot stabilize movement. It creates a thin film over an unstable surface, and that movement will eventually show through as cracking, peeling, or a visible outline.
Inspect grout separately from the tile face. Grout may be porous, stained, soft, or contaminated with mildew, and it may accept a coating differently from glazed ceramic or porcelain. Remove unstable grout and failed silicone before painting. If mold is present, clean and dry the affected area first. The EPA's guidance on mold, moisture, and the home warns that paint applied over mold is likely to peel.
Understand the tile you have
Tile substrate | Adhesion difficulty | Suitable coating family |
|---|---|---|
Glazed ceramic | High, because the glaze is slick | High-adhesion bonding primer with epoxy, epoxy-acrylic, or compatible urethane coating |
Porcelain | High, because the surface is dense and low-porosity | Tile-rated bonding primer with a compatible hard-wearing coating |
Unglazed ceramic or quarry tile | Moderate, depending on porosity and contamination | Compatible masonry or tile primer with a suitable topcoat |
Natural stone | Variable, with moisture and staining concerns | Stone-appropriate coating or stain-and-sealer system, tested first |
Natural stone needs its own test. Unsealed slate, limestone, and other porous materials can absorb moisture and stains. A film-forming coating may also change how the stone releases vapour. Test a hidden section, particularly before coating a damp-prone wall or floor.
Assemble the complete system
Have the cleaner, scrub pads, rinse water, abrasive paper, vacuum, masking materials, repair compound, primer, topcoat, small brush, short-nap or foam roller, gloves, eye protection, and suitable respiratory protection ready before starting. Epoxy and urethane products expose flaws in tools and technique, so a household roller that sheds fibres can ruin the finish.
Check the product's application temperature, humidity range, recoat window, and return-to-service instructions. Bathrooms often run cool or damp, and both conditions affect adhesion and curing. One technical sheet for a two-component epoxy tile primer specifies a clean, dry, contaminant-free surface and a minimum curing period of 8 hours at 25–30°C before subsequent work. Follow the product label and technical data sheet, not a generic schedule. Manufacturer guidance on cleaning and drying tile before coating makes the same practical point about surface condition and choosing a system suited to the tile.
Plan for several days of bathroom downtime. A coating can feel dry while remaining vulnerable to water, pressure, and cleaning chemicals. If ventilation cannot keep the room dry, or the substrate cannot stay dry through curing, do not start.
The Prep and Application Sequence That Holds
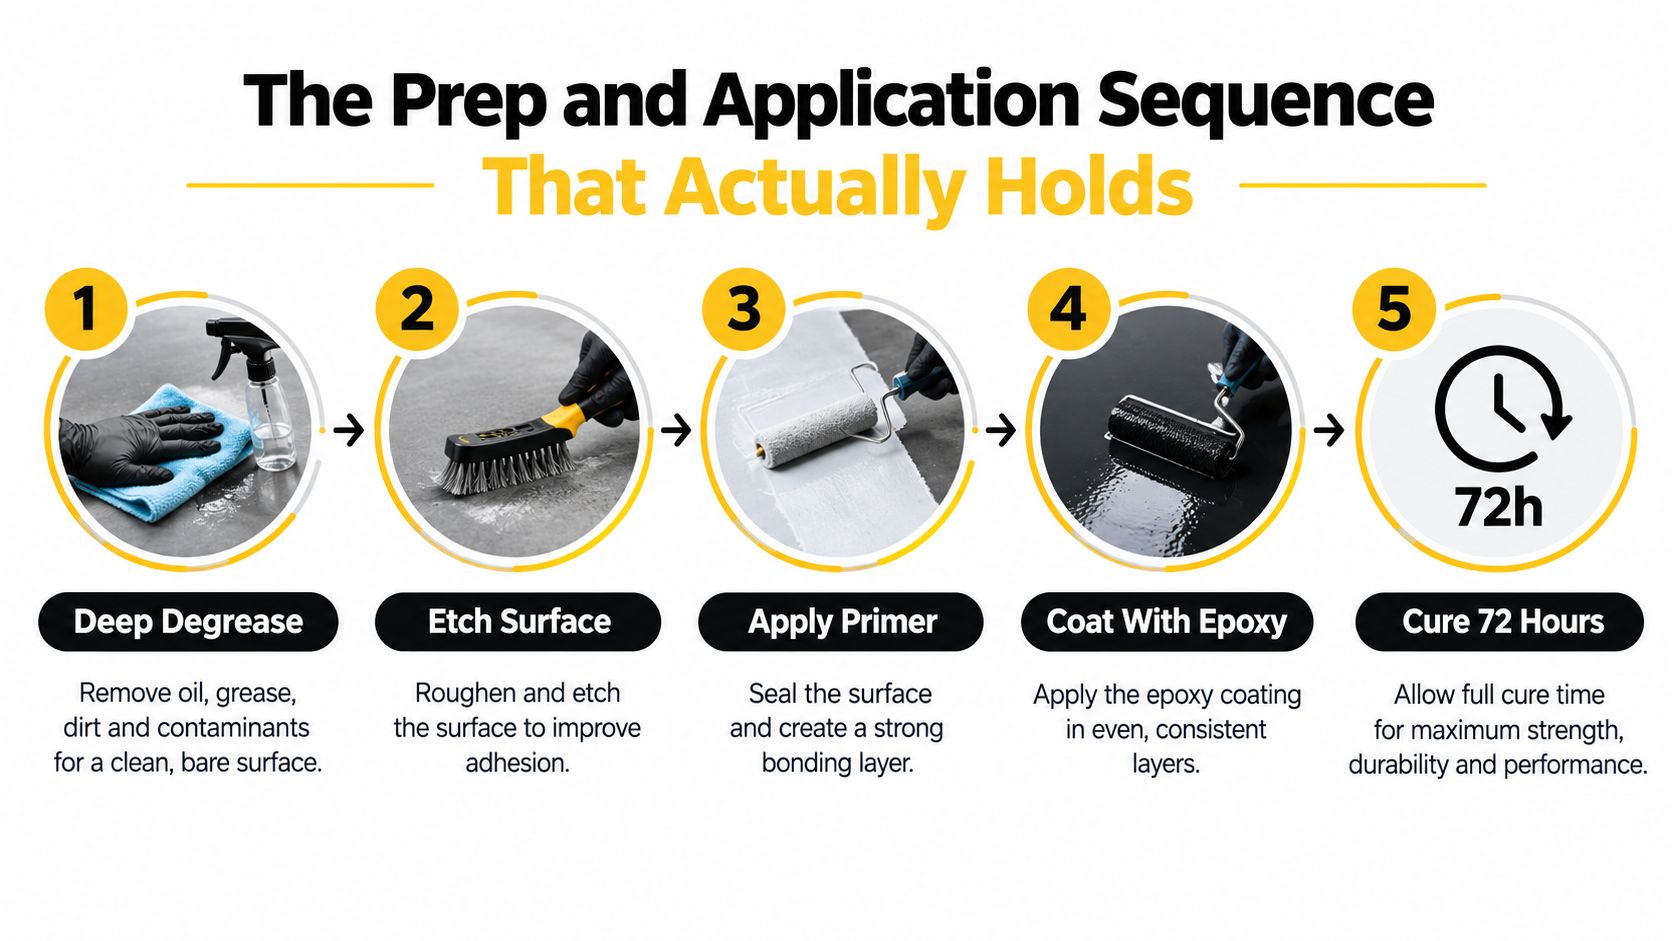
Can the coating stay bonded in your bathroom? The answer depends less on the colour than on the order of the work. Skipping one stage often creates a delayed failure, such as peeling along grout, bubbling beside the shower edge, or soft areas on the tile face.
Sort the surface by moisture zone before you begin. A backsplash usually faces light splashing, a wall may tolerate more moisture, a shower surround receives repeated water, and a floor adds abrasion and standing moisture. Do not paint if the substrate stays damp, the room lacks ventilation to carry moisture outdoors, tiles move under pressure, or the coating cannot cure without regular water exposure. A dry-looking surface is not enough when moisture is coming through the joint, wall, or floor.
1. Remove unstable materials
Remove silicone caulk at changes of plane, around tubs, and along countertops. Scrape away loose paint and failing sealer. Re-grout joints that crumble under light pressure, and replace tiles that move when pressed. Paint requires a stable surface beneath it. Apply new caulk as a finishing step only where the coating manufacturer permits it, rather than using caulk to conceal a wet or failing joint.
Fill chips with a waterproof or epoxy repair filler. Ordinary spackle is made for relatively dry interior surfaces and may soften or fail inside a bathroom coating system. Allow repairs to harden fully before cleaning or priming.
2. Degrease and rinse
Use an appropriate alkaline cleaner or tile-safe degreaser to remove soap scum, body oils, mildew residue, and hard-water deposits. Scrub grout lines as carefully as the tile faces, because contamination often remains in the joints. Rinse until no cleaner remains, then let the surface dry completely.
A tile can look clean and still reject primer. A thin soap film acts like a release layer between the substrate and the coating.
3. Dull the glaze
Lightly abrade glazed ceramic or porcelain with approximately 400-grit abrasive. Work until the sheen is uniformly dulled, without cutting deep scratches into the surface. Vacuum the dust and wipe the area clean. Do not use sanding as a substitute for degreasing. Abrasion gives the primer a better mechanical key, but it does not remove oils or mildew residue.
4. Prime for adhesion
Choose a bonding primer rated for glazed tile, glassy surfaces, or other slick, nonporous materials. Porous tile may require another primer family, such as a compatible masonry or stone primer. Apply an even film without flooding grout lines or allowing runs to collect in corners.
Follow the product's technical sheet for curing and recoating. A second primer coat may help when the substrate remains uneven or the product calls for one. Adding coats too soon can trap solvent and interfere with adhesion.
5. Apply thin, compatible topcoats
Brush edges and grout lines carefully, then use a short-nap or foam roller across the broad tile faces. Apply two or three thin coats, not one heavy coat. Thin films level more predictably and are less likely to remain soft in recessed grout lines.
Use Case | More Suitable System | What It Handles Best |
|---|---|---|
Dry backsplash | Tile-rated acrylic or epoxy-acrylic system | Light splashing and routine wiping |
Vanity splash zone | Epoxy-acrylic or urethane system | Moisture around sinks and occasional cleaning |
Shower wall | Tile-rated two-part epoxy or urethane system | Repeated splash exposure, with cautious maintenance |
Low-moisture floor | Floor-rated coating system | Foot traffic, only when the product allows tile use |
Let each coat dry and recoat within the manufacturer's stated window. Smooth nibs or roughness between coats only when the instructions permit sanding. Do not coat over tackiness, visible contamination, or condensation. This five-step epoxy coating preparation and application infographic shows the sequence visually.
6. Cure before returning the room to service
Technical guidance for epoxy and urethane systems commonly places water exposure at roughly 3–7 days, depending on the product and environment. Cure-time guidance for bathroom tile coatings distinguishes a surface that feels dry from one that has developed full hardness and chemical resistance.
Keep the exhaust fan moving air outdoors during application and curing. Leave the bathroom out of service for the full period stated by the product, especially for a shower or floor. If the preparation is beyond your tools or the room cannot remain unused, a qualified handyman service for bathroom surface repairs can handle repairs and preparation before coating begins.
This video provides a visual reference for the general preparation and application process:
Choosing the Right Coating System for Your Tile
The right coating depends on tile type, moisture zone, abrasion level, and cure requirements, not just the color or sheen on the tin. A backsplash, shower wall, and bathroom floor may use similar tile, but they place very different demands on a coating.
A two-part epoxy generally forms the hardest film among common bathroom options. It can suit damp vertical surfaces, provided the substrate is dry and the room has strong ventilation during application and curing. It also requires accurate mixing and disciplined application. Two-part urethane can bond well to properly abraded ceramic and porcelain, while epoxy-acrylic products may be easier to manage on walls and backsplashes.
Acrylic enamel is more practical in low-splash areas, such as a vanity wall or backsplash, but it is a poor choice for a shower surround unless the product specifically approves that exposure. Floor-rated coatings can handle foot traffic better than wall paint, yet foot-traffic resistance does not make a product suitable for standing water or continuous immersion.
Coating System | Best Location | Cure Time | Expected Lifespan |
|---|---|---|---|
Two-part epoxy | Damp vertical walls and demanding splash zones | Follow the technical data sheet before water exposure | Properly prepared painted tile may last several years, with shorter service in high-wear zones |
Epoxy-acrylic tile coating | Backsplashes and moderate-splash walls | Product-specific | Usually better suited to walls than floors or immersion |
Two-part urethane | Ceramic and porcelain after abrasion and priming | Product-specific | Use only where the product approves the exposure |
Floor-rated tile coating | Low-moisture bathroom floors | Product-specific | Depends heavily on traffic, grit, cleaning, and water exposure |
Stone stain-and-sealer system | Selected porous natural stone | Product-specific | Depends on maintenance and the stone's condition |
Read the technical data sheet before choosing a system. Check its approved substrates, moisture limits, primer requirements, recoat window, cleaning restrictions, and permitted exposure. If the sheet does not approve a shower, floor, or continuously wet area, do not rely on a stronger primer or extra coats to make it suitable.
Natural stone needs separate consideration. A porous mineral surface may respond better to a masonry primer than to a slick-tile bonding primer, but the stone must be dry, stable, and free of persistent moisture. Test an inconspicuous area for darkening, uneven absorption, and changes in appearance before treating the whole surface.
When the economics make sense
Painting is sensible when the tile is structurally sound, the layout works, and the problem is mainly an outdated color or finish. It can refresh a backsplash, vanity wall, or other low-impact surface without the mess and downtime of demolition.
Replacement is usually the better route when tiles are loose, grout is failing throughout, leaks keep returning, or the surface receives constant immersion. Include repair work, cleaning products, touch-ups, bathroom downtime, and eventual coating removal in the calculation. Scraping or sanding a failed coating may damage the original glaze and make later replacement harder.
A professional painting service can help distinguish a suitable coating project from repairs that must happen first.
Where Painting Breaks Down and What to Do Instead
Bathroom tile does not fail as one category. A dry backsplash or vanity wall can accept a coating when the tile is sound and the room ventilates well. A shower wall, shower floor, or bathroom floor faces repeated moisture, abrasion, and movement, so the same coating may fail quickly. A stronger product cannot rescue a damp substrate, failed waterproofing, or unstable grout.
A practical do-not-paint checklist:
Shower floors: Standing water and foot traffic create the harshest conditions. Replace damaged tile or use a professional resurfacing system rated for floors and constant exposure.
Continuously wet shower walls: Tile inside a regularly soaked enclosure can allow moisture through joints and edges. Repair the waterproofing or replace the surround instead of coating over the problem.
Cracked or loose tiles: Movement will split the coating and create openings for water. Stabilize or replace the tile before considering any finish.
Failing grout: Soft, crumbling, or repeatedly darkening grout needs removal and repair. Coating over weak joints traps the defect beneath a clean-looking surface.
Mold-affected substrates: Clean and dry the area, then correct the moisture source. The EPA's remodeling recommendations call for exhaust fans and as much ventilation as possible from the start of painting through 2–3 days after completion, since most paint VOC emissions occur during drying.
Laminate or vinyl tiles: These surfaces can flex, contain printed wear layers, or have failing adhesive. A tile coating is difficult to make reliable, and replacement is usually more predictable.
Poorly ventilated bathrooms: A coating needs a room that can shed humidity while it cures. Improve exhaust ventilation before applying any finish.
Check the substrate after normal bathroom use, not only when it looks dry. If moisture lingers, grout keeps darkening, or the room remains humid and stagnant, stop treating the job as a painting project. Find the leak, improve ventilation, repair the substrate, or replace the affected area.
Do not paint to hide a moisture defect. A fresh finish can conceal deterioration while the underlying problem continues.
Living With Painted Tile Day to Day
Painted tile should be maintained like a refinished surface, not bare factory ceramic. The coating may be hard after curing, but abrasive cleaning can still dull it, scratch it, or wear through high points around faucets and corners.
Use pH-neutral soap and a soft microfiber cloth for routine cleaning. Rinse away residue and dry surfaces where water tends to sit. Avoid abrasive pads, scouring powders, bleach pens, acidic descalers, and stiff brushes. These products can attack the film mechanically or chemically, especially at grout ridges and exposed edges.
Steam mops deserve a clear warning on painted floors. Heat, moisture, and pressure delivered repeatedly to a coated surface can shorten its service life. Use a damp cloth or a cleaning method approved by the coating manufacturer instead.
Protect the early cure
During the first several days, keep water, steam, scrubbing, and objects from pressing against the finish. A coating can feel dry before it has fully hardened, so don't judge readiness by touch alone. Follow the manufacturer's return-to-service instructions, keep the exhaust fan operating as recommended, and avoid turning the room into a test of the coating's limits.
After the initial cure, normal bathroom use is reasonable if the surface was matched to the zone. Wipe standing water from sills, countertops, and splash areas rather than allowing it to remain at the edges. Good ventilation reduces the amount of moisture that settles on the finish and grout.
Inspect the joints and corners regularly. Hairline cracks around a faucet base, tub edge, or change of plane should be addressed before water reaches the substrate. Use a compatible sealant where appropriate, and don't apply new silicone over dirty, damp, or failing material.
Keep a small record under the sink with the coating brand, color, product family, batch information, and application date. A matched touch-up kit can hide a small chip at a corner or faucet base, but touch-ups work best when the surrounding area is cleaned, lightly prepared if required, and completely dry. A completed painting and repair portfolio can also help you compare the level of finish expected from a careful professional job.
Your Decision Framework and Common Questions
Can your bathroom tile take paint without becoming a maintenance problem? Use the moisture zone, substrate condition, and coating instructions to make that call.
Backsplash or dry wall tile: Usually the best candidate. Paint is reasonable where exposure is limited to splashes and the surface can dry fully between uses.
Shower wall tile: Proceed only if the coating is specifically approved for repeated water exposure. Good ventilation and a sound, dry substrate are required.
Shower floor or tub surround: Treat these as high-risk areas. Standing water, constant wetting, and abrasion shorten service life, so replacement or professional resurfacing may be the better choice.
Bathroom floor tile: Paint only with a product rated for floors and the expected traffic. A coating that works on a wall may wear quickly under shoes, grit, and frequent cleaning.
Do not paint if the room cannot ventilate, the substrate stays damp, leaks are active, mold is present, tile is loose, grout is failing, or the coating cannot cure within the manufacturer's stated conditions. Paint is a cosmetic finish, not a repair for movement, water intrusion, or unstable tile.
Choose paint confidently for stable backsplash or wall tile in a low to moderate splash zone. Prep and paint cautiously on a shower wall or bathroom floor only when the tile is sound and the product is approved for that exposure. Repair, replace, or hire a refinisher when moisture, immersion, mold, loose tile, or failed joints are part of the problem.
How long do painted bathroom tiles last?
Properly prepared painted tile may last approximately 3–8 years. The actual service life depends on the tile, traffic, cleaning, and water exposure. Wall tile and backsplashes generally outlast shower floors and other surfaces that hold standing water. Treat the range as a planning estimate, not a promise.
Can you paint over cracked grout?
Not as a durable repair. Remove unstable grout, find and address movement or moisture, let the joint dry, and coat only after the substrate is stable.
What happens in a steamy bathroom without a fan?
Humidity slows curing and allows condensation to collect on the finish. Peeling and bubbling become more likely. Improve ventilation before painting, then follow the coating manufacturer's temperature and humidity limits.
Is peel-and-stick tile a better option?
It can be easier to reverse, but it will not fix dampness, loose tile, mold, or failing grout. The adhesive still needs a clean, dry, stable surface.
Can tenants paint bathroom tile without losing their deposit?
Get written permission before changing a landlord-owned finish. Confirm acceptable products and colors, photograph the existing condition, and keep the product information. A failed coating may leave the tenant responsible for removal or replacement.
How does professional resurfacing differ from DIY painting?
A refinisher assesses moisture, removes failing materials, prepares edges and joints, controls application, and rejects unsuitable surfaces. The difference is the diagnosis, preparation, environmental control, and responsibility for the completed system, not only the coating in the can.
Analysts in Houzz's 2025 U.S. Bathroom Trends Study report that 79% of renovating homeowners chose tile for upgraded shower flooring, 23% selected VOC-free paints or finishes, and 81% upgraded wall finishes. Those figures reinforce the need to separate a visual refresh from a durable finish upgrade, especially in wet zones.
1st Choice Home Repairs provides practical handyman work, interior and exterior painting, and repair services for homeowners, landlords, and sellers in St. Charles, O'Fallon, Lake St. Louis, Chesterfield, Wildwood, St. Peters, Ballwin, and nearby communities. If your bathroom tile needs more than paint, visit 1st Choice Home Repairs to discuss substrate repairs, coating work, or replacement.
Comments